DIY Wool Wreath

Remember how everyone went goofy for that tufted wool wreath from Anthropolgie, and there were DIYs everywhere? I had to. There was a NEED you see. My old wreath didn’t work anymore because the storm door always pushed it so hard against the wood that it took off the paint..and every Spring I’d have to touch it up. I finally decided enough was enough; I needed a slim profile wreath with some give to it.

Modfrugal DIY wool wreath

I used Lion Brand Homespun Thick and Quick in the Dove colorway. I followed this tutorial, except I cut the bundle once through the middle instead of twice on each side so my pom poms were longer and looser.Modfrugal DIY wool wreath

Modfrugal DIY wool wreath Then I hot glued them onto a thin MDF wreath form I got at Michael’s (couldn’t find it online) and the whole thing was done for about $16.00. No more scraped paint!

DIY Death Star Ornament

It’s that time of year my friends! The CC makes his annual DIY ornament for the Things. This year, he’s really blown me away. LED Death Stars!!! He has created an Instructable here.

He won 1st prize for the “Make it Glow” Instructables competition for last year’s TARDIS (although we both thought the Dalek was better!) So maybe he’ll make the finals this year too – who knows!


CC's DIY Death Star on Instructables

CC's DIY Death Star on Instructables

CC's DIY Death Star on Instructables

Crafty Time: Advent Calendar

I didn’t grow up with advent calendars, so I naturally felt a little cheated when I found out about them later in my childhood. “Wait, you mean you get a surprise EVERY DAY for the whole month of December, THEN you get Christmas TOO!?”  Wretched excess. Unbelievable. Ridiculous. By this point I was a little too old to ask for one, and I thought it would make me look greedy, so life goes on.

I grow up and have my own children, and it honestly hadn’t occurred to me to do the advent calendar thing with them, until my brother in law brought one with the little chocolates on a visit just before the holidays.

It’s not what’s inside, (although my kids maintain the Trader Joe’s one had crummy flavor) but the thrill and anticipation of the big countdown. So I decided to embrace it. That following year I got the thumbs down TJ’s version, then I got a Playmobil one the next year, then the Lego Star Wars version the next year, and HOLY COW those Lego ones are too expensive. It is time to get back to basics.

I love the DIY advent calendar Jordan Ferney did HERE, and I wanted to adapt it, so…much I like I approach every recipe, I had to mix it up. Here’s my version of the Oh Happy Day advent calendar.

I traced numbers onto paper circles then went over the pencil with a gold paint pen. I got the Helvetica stencils at Michael’s years ago, and do not see them on their website now.

Modfrugal advent calendar

Then I got the silver boxes from Michael’s HERE, and the bottle brush trees from Factory Direct Crafts HERE.

I unholstered the glue gun, attached the trees, and they are ready to fill! We do not put candy in every day, but like to mix it up with activities, clues to a mini scavenger hunt and tiny trinkets.

Modfrugal advent calendar

Modfrugal advent calendar

Modfrugal advent calendar

Modfrugal advent calendar


Modfrugal advent calendar

modfrugal advent calendar

December 1st falls on the last day of a hectic Thanksgiving holiday weekend, so I needed to get this done now before I’m too deep in Thanksgiving prep.

UPDATE: It will reside in the dining room for the month.

Modfrugal DIY Advent Calendar

Butterfly Chair Makeover

Modfrugal Butterfly Chair Rehab

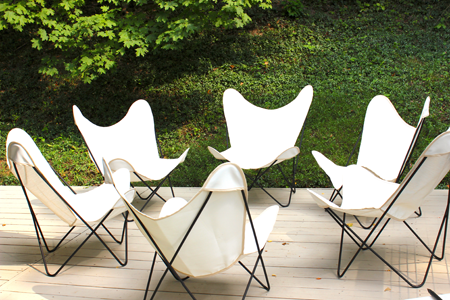
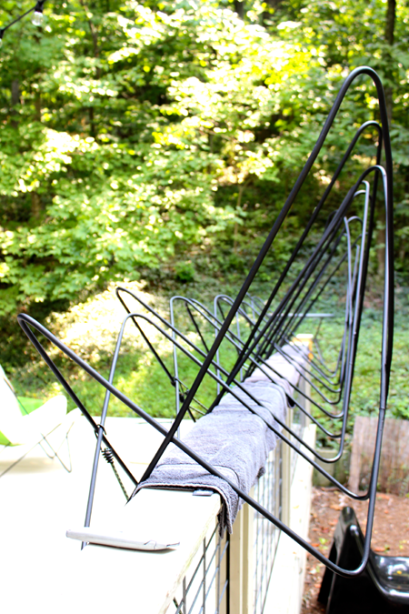
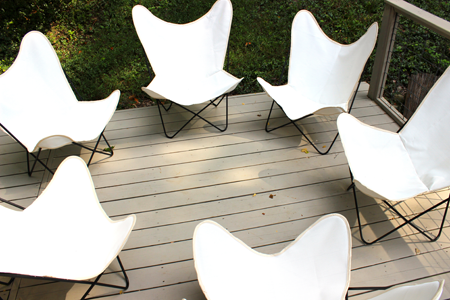
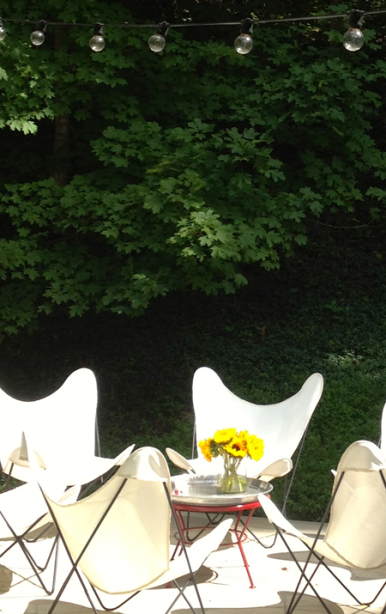
I have been picking up BFK/Hardoy, aka butterfly chairs for years, and they are showing some wear, plus the last pair I acquired were peeling and rough. While I would still like to get them sandblasted and powder coated, that will cost hundreds of dollars, and I wanted a down and dirty rehab before our last movie night that wouldn’t cost much more than time.

Sanding with 100, then 200 grit sandpaper and spray painting them a flat black did the trick, but my biggest concern was the feet. I finally re-stained our decking, and I didn’t want the metal chairs to leave rust stains on the fresh new finish as they had previously.

Modfrugal Butterfly Rehab

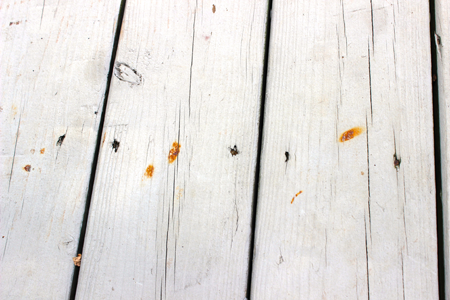
This is what I had all over the deck before I gave it a top coat….


Modfrugal Butterfly Rehab

Annoying, right? The CC thinks I have unrealistic expectations of the deck, when I point out these things, he laughs and says – “It’s a deck, not the hardwood floors!”

No, it’s not, but it doesn’t mean I want our barely 4 year old deck to look trashy already..K?

Modfrugal Deck Rehab

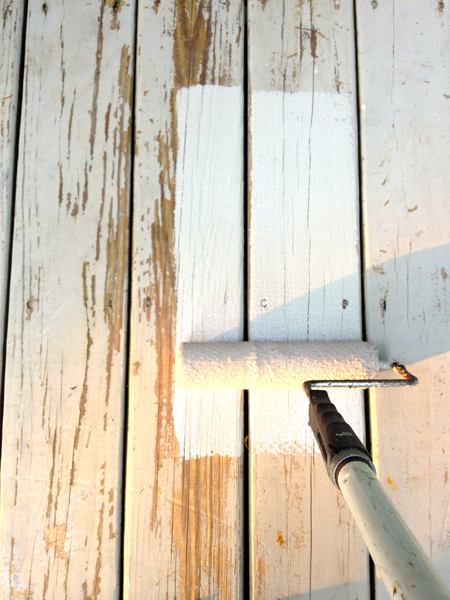
So I did my thing. I had to pressure wash it a second time since our summer was so wet, all the gunk I had washed off this Spring was back, and it took quite a bit of the stain with it.

For those wondering why we stained the deck rather than let it age naturally – we salvaged wood from our previous deck when this one was built, so we had sections of different age etc.. The boards would never look uniform as a whole area, so we stained it for both a cohesive aesthetic, and a way to reflect sunlight in the hot Tennessee summers.

Back to the chairs!

So, my dilemma was that I needed some kind of foot, or moisture barrier for these chairs. I have seen feet where you have to drill into the base of the chair – um, NO, and I don’t actually want to SEE any feet, because I’m picky like that.

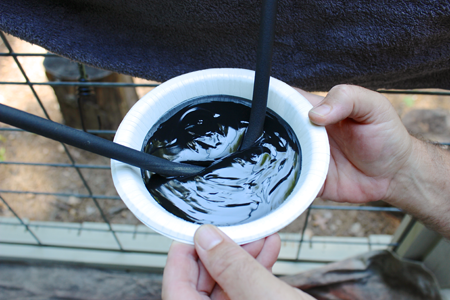
So we thought we were pretty darn clever, and decided the best solution was to put black silicone on the bottom of the chairs.

Modfrugal Butterfly Rehab

Modfrugal Butterfly Rehab

Modfrugal Butterfly Rehab

Awesome!!! After sitting in them for a day, we peeked underneath and this is how it had settled in! Problem solved. Now we can start working on something else, like FINISHING THE PANTRY.

Modfrugal Butterfly Rehab

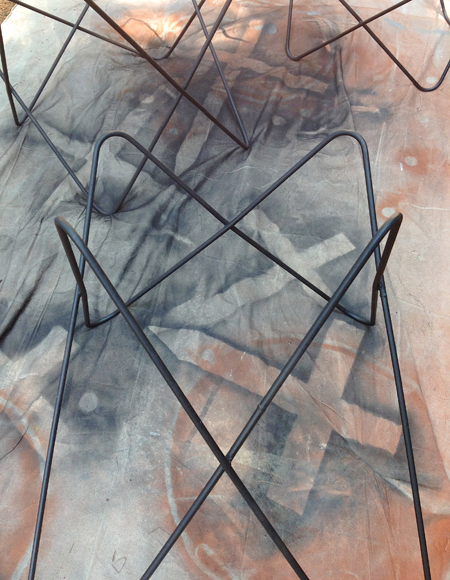
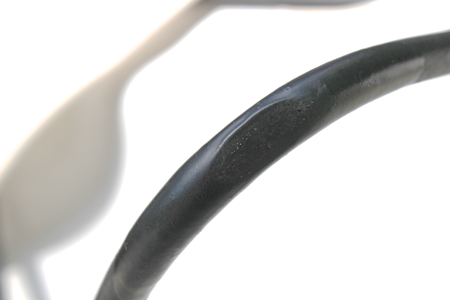
WRONG. After a few more days and a little dragging around, this is what the feet looked like….

Modfrugal Butterfly Rehab

Back to the start. Then I had another bright idea -  for real, this one might work, maybe.

Modfrugal Butterfly Rehab

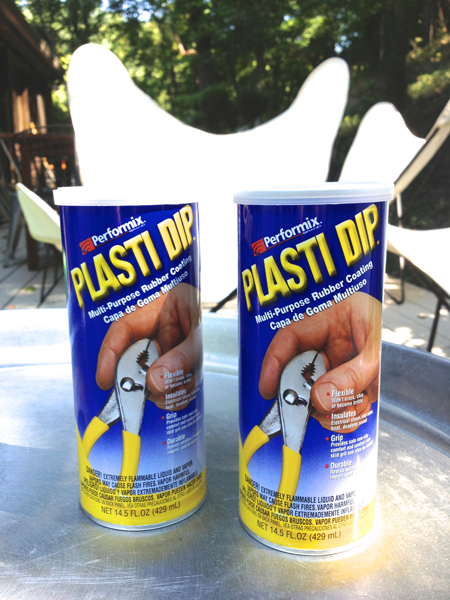
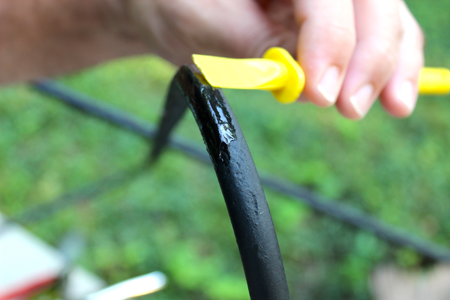
So we scraped the remaining shreds of silicone off and had a dipping party – twice. Two coats for good luck.

Modfrugal Butterfly Rehab

Modfrugal Butterfly Rehab

Modfrugal Butterfly Rehab

I’m in love. How has it taken me this long to discover the joy that is Plasti-Dip? I want to dip ALL THE THINGS. They have a spray version and I am seriously considering using it on…something, anything, I don’t know, but I’ll find something.

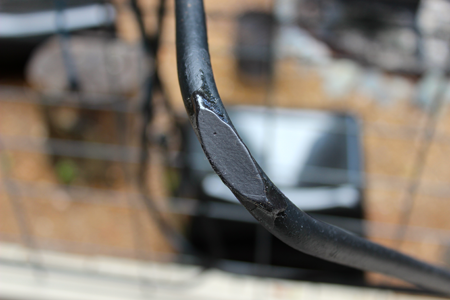
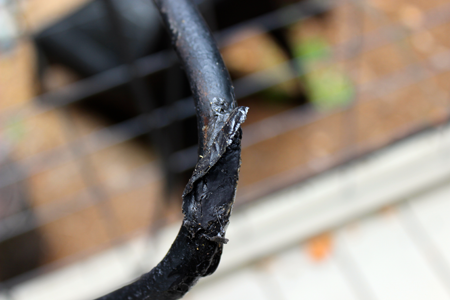
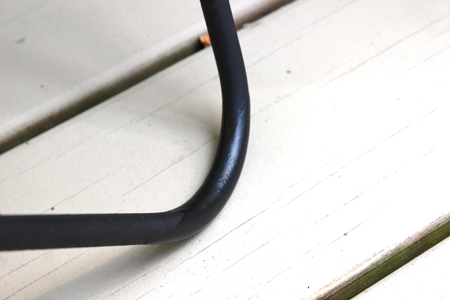
Anyway, it is doing just the job I wanted. It is sturdy enough to handle some light dragging and both deck and chair stay protected. The BEST part is that you really have to look hard to see it, and for resale value etc.. Plasti-dip is completely removable. YES, you read that right. How is it holding up? Why, let me show you….


Modfrugal Butterfly Chair Rehab

Yup. Aaaaand is it noticeable when you look at the chairs?

Modfrugal Butterfly Chair Rehab

You tell me? I’m giddy, GIDDY I tell you.

This will come in handy for all hairpin legged furniture. Protecting hardwood floors, anything – you get the idea.

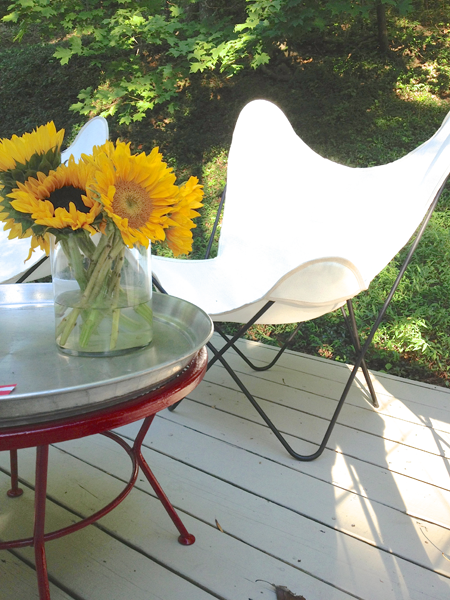
I should also mention that I ordered new covers from D & J Patio – white “space weave” designed for outdoors. About $20 less than the ones at Circa 50 BUT, they only come in one size. They fit the largest frames the best and we might take in the seam a smidge on our lower set frame covers. I just couldn’t face spending $60+ shipping per chair when I needed 6 new covers.

Another tidbit to know is that they are SLOOOOOOOOW to ship, so establish their stock availability before you order for a particular event. (ours came a full MONTH after ordering). With all that in mind, I am pleased with the quality of the covers and think they are going to work out just fine.
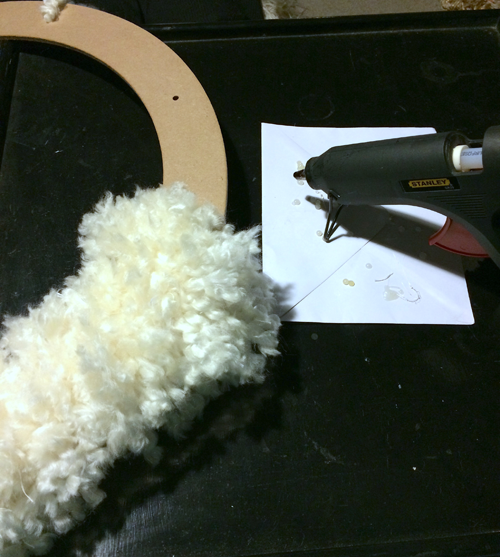
 

Modfrugal Butterfly Chair Rehab

Modfrugal Butterfly Chair Rehab

Modfrugal Butterfly Chair Rehab

Reader Mailbox!!

Guys, I got the BEST thing in my inbox the other day, and I am so excited to show you! Adam Crockett was looking for some DIY modern mailboxes and happened upon the very first post ever here at Modfrugal. Guess what he did? He rocked his own modern mailbox!  Check it out!

photo 5

photo 4

photo 3

photo 2

Crockett mailbox

What a great job he did..right?!

Thank you SO much for sharing Adam!! We LOVE hearing from readers like you and feel honored to have provided even a glimmer of an idea.

UPDATE: Reader Wendall Krahn just sent in his mailbox as well…with scrap lumber on hand, his mailbox clocked in at only $60!  Excellent job Wendall!!


photo 1

photo 2

photo 3


Pantry Update: Roadblock

Wellllll, I was hoping to have a finished space to show you by now, but we are a bit hung up. Things were going SO well, ahead of schedule, we were killing it! Now? Notsomuch.

Ah, such fools we are. I would think we’d have become bitter and jaded after the number of snags and bumps we have hit over the years of renovating together, but we get this blinding surge of optimism and excitement that a new project inevitably brings….such that makes the memory of all previous disappointments somehow fade away into the land of the forgotten. Deep down, we KNOW there will be a problem, but it doesn’t deter our giddy renovation fueled endorphin rush.

The latest version of said rush was in full swing last weekend when I posted our progress on Instagram…

pantry progress

Cabinets up, with some cardboard thrown on for countertops to hold a few light tools. SO CLOSE. We need the matching quartz counter, some filler strips and a backsplash. Easy, right?

WRONG. Both the quartz (Silestone Blanco Maple) and the backsplash, Porcelanosa Stick Wenge have been discontinued. We thought we had enough tiles left for the backsplash, but we don’t.

This is what you get for procrastinating 4 years to finish your kitchen. We are now searching ebay and stone dealers for offcuts and leftovers. When we demoed the original kitchen, we saved the white Corian countertop to use down in the workshop. For the moment, that will be our counter, so thankfully, we are able to use this space while we search,  but our completion date is now in limbo.

kitchen temporary counter

The Corian and the cabinets are very different tones of white, so it can’t stay, but we need to formulate a plan B in case we can’t find our matches. Dark stained butcher block is emerging as a logical second material, but we’ll see. Learn from us people, and don’t procrastinate if you plan to match materials, because even the safest, most popular style can disappear on you while you blink.

We’ve had house guests for the past week, continuing through this week, so we are grateful just to have it functioning and the messy chaos gone. We’ll keep you posted as we learn more!