Happy New Year! Yeah, I’m a bit late. the bloggaversary came and went, and I was too ashamed to even mention it because, really, why draw attention to the fact that I’m a terrible poster these days. “Hey, it’s been 6 years and I got nothing!”
So here I am, and I finally have something . Yay for not wasting your time?!? It’s a long one though, so come back, or settle in for awhile.
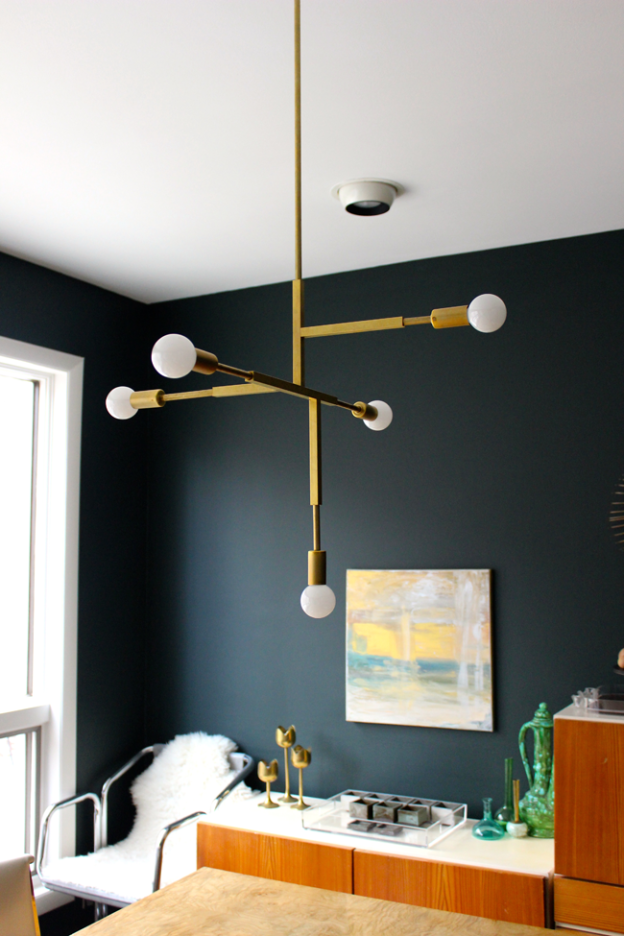
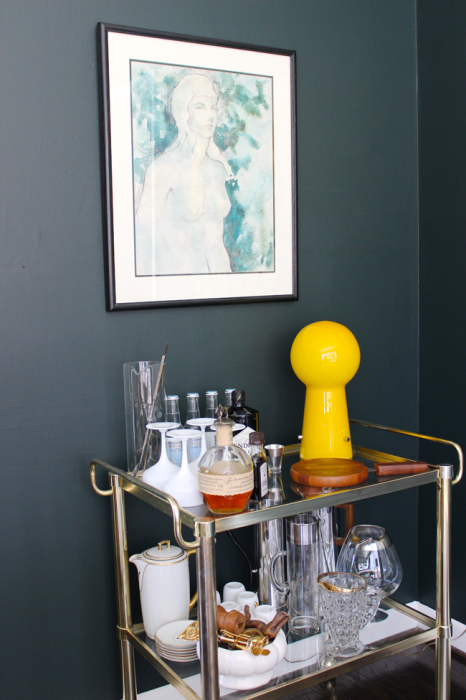
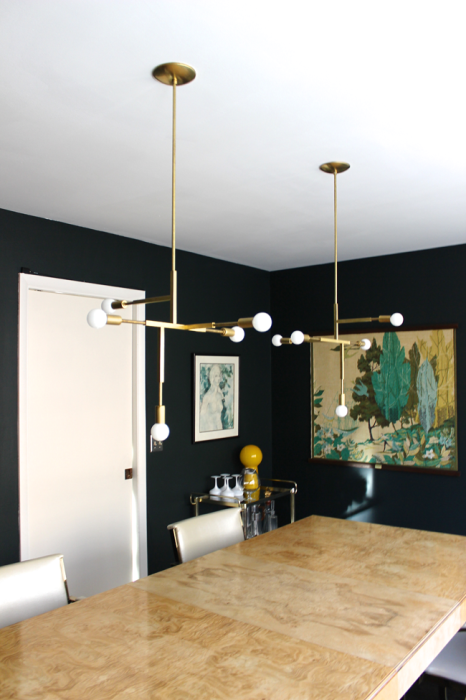
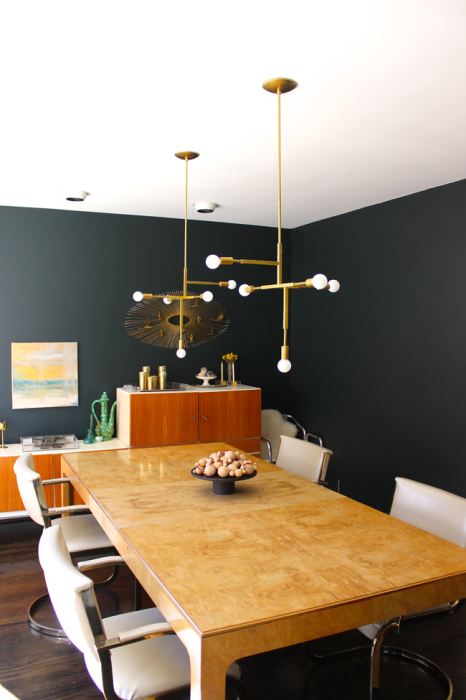
Dining room – nothing was wrong with it…I’ve redone it from it’s former milquetoast carpeted glory, but we had some settling cracks and I have been rearranging art in there like it’s nothing, so the walls were needing a fresh coat of paint. The “touch ups” were not really blending in anymore, so I figured, if I have to expend the effort to repaint the entire room, let’s change the color. I loved having a black dining room, and the drama of that contrast was something I still wanted, but warmer – enter Dark as Night – an Olympic color I had mixed in a premium Valspar flat paint.
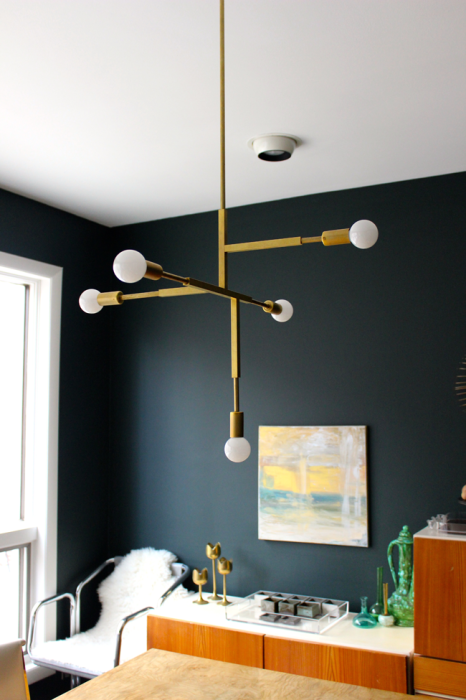
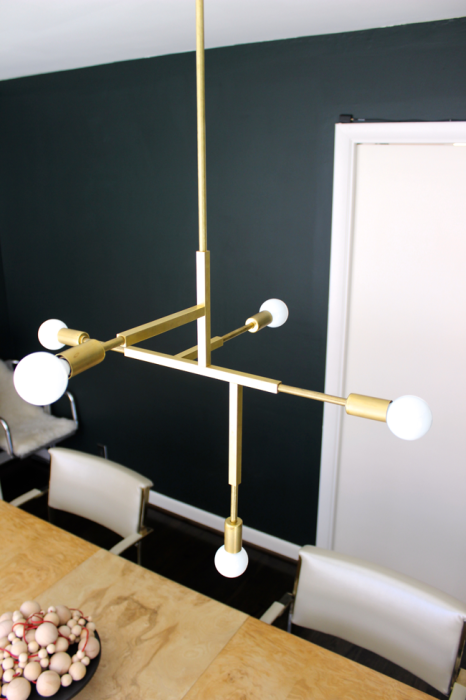
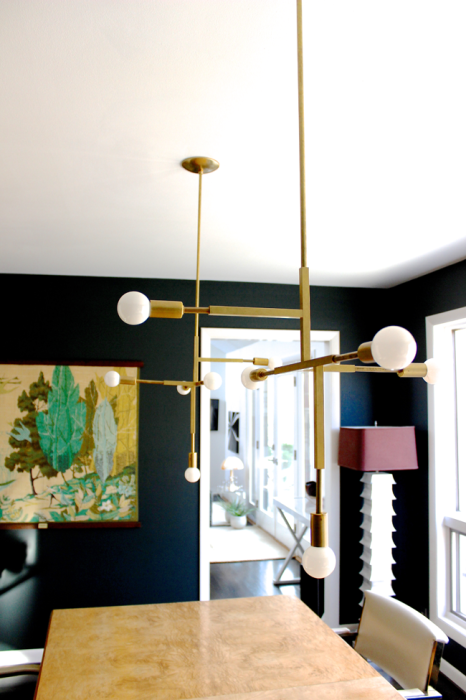
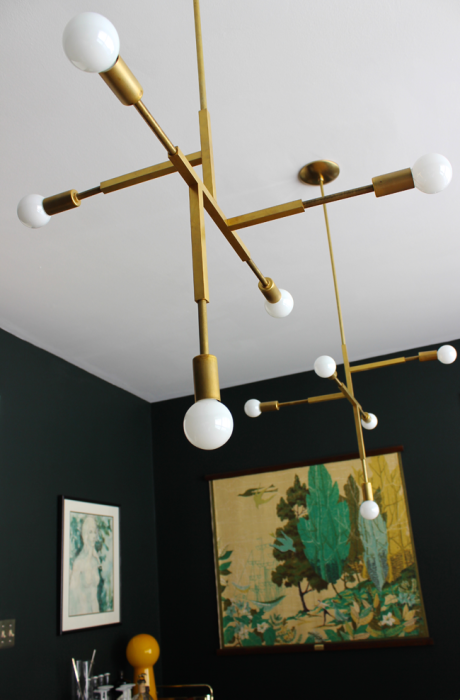
Instafriends know I got a new dining room table in the fall, and I thought the gold tones of the olive wood would look better with a deep green instead of the black, and I was right – I’m really loving it. Pushing onto more golden/brassy tones in the room, I decided we needed to make some brass pendants to hang over the table, as you do.
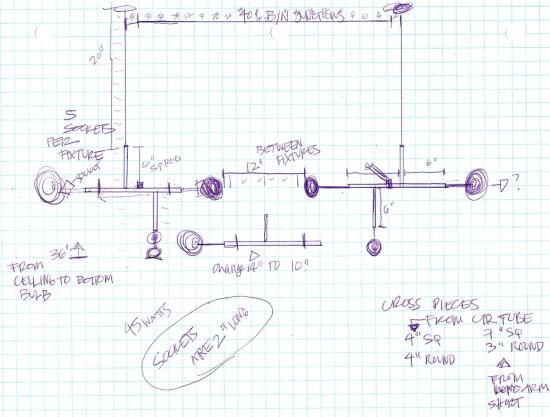
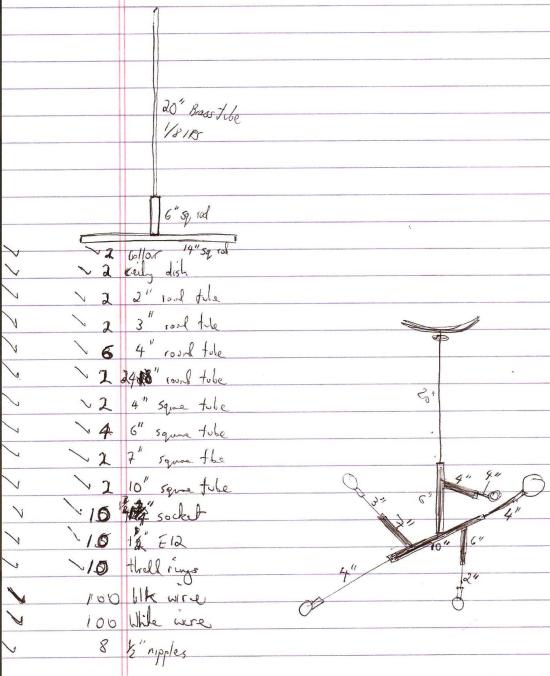
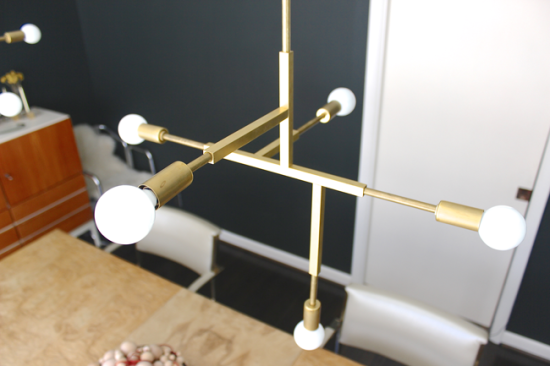
I fell in love with Lambert and Fils Cliff Suspension Lamp, but  I liked having 2 smaller fixtures rather than one big one in there, not to mention I didn’t have thousands of dollars lying around to spend on lighting I didn’t actually NEED. Let’s make our own version! I sketched out some dimensions and such in the near unintelligible way that only the CC can read, and next thing you know, parts are ordered and he has taken over making it WORK. At this point, I hand over the reins to the engineer of the family and let him tell you how he made the lamps.
______________________________________________
The lesser spotted CC here, taking up the invitation to show you how we did it. There isn’t much out there in the way of modern DIY lighting walkthroughs (Lindsey Adelman, and that’s about it) for non-traditional chandeliers/lamps, and it was a little difficult finding quality know-how from the lamp world forums and such, so hopefully this will inspire others to have a go.
So – when Modfrugal showed me the design she liked, it looked pretty straightforward to pull together the smaller pendants she envisioned…assuming we could find the brass parts. I am an optimist, after all. The real challenge, to me, was going to be the wiring. It would take some thinking through, but if others have made it work, I knew I could too. Main concern was thickness of the wire – there isn’t much space in the tube for a bunch of wires, and nowhere really on the pendant to splice wiring together. Most chandeliers have a central hub of space where wiring to each socket is spliced together so that a single pair of wires then runs to the outlet/junction box. That wouldn’t be possible with this design. Other online DIYs have used thinner than 18 gauge wiring, and I can’t stress enough how dangerous this can be. I’m not a scaremonger, and will cut corners with the best of ’em, but you don’t want to mess with electricity and burn your house down. My sources said to use a minimum of 18 gauge wire, with appropriate high-heat insulation (because the wire(s) can heat up in the close confines of a brass tube). Use the code. Having said that, I’m not an electrician so don’t rely on my advice and do your own research. You’re on your own, because, legal disclaimer.
First stop was www.grandbrass.com (the same people who sell the Adelman kits), and conveniently we needed to look no further as they had everything we wanted. They also have a useful help guide here that explains the various components and sizes and what each piece is called etc.
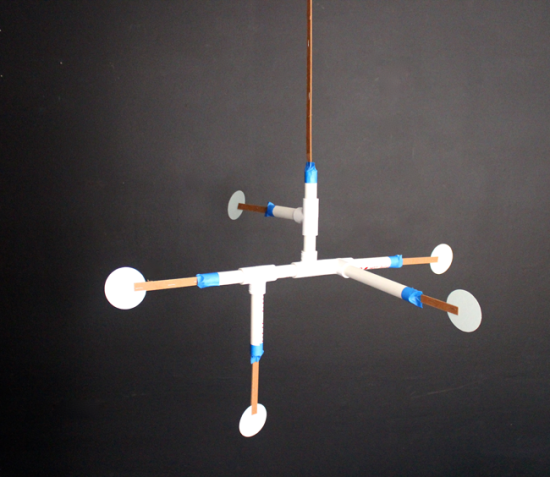
Now for the design. We started with PVC pipe, tape, and cardboard, to quickly put together a couple of template/prototype pendants. We held these up to the ceiling in the dining room, adjusted various lengths etc, until we had what we thought were good dimensions. We then transferred these to paper and sketched up the design with all the elements, and then a blow-up sketch showing each piece we’d need to order. The plan here was to try and place one complete order for the entire project…vs. our usual of having to go back multiple times for forgotten bits and pieces. Pleased to say we succeeded.
All the pieces were standard 1/8 IPS (the common size for most lamp fixtures), and all the round/square brass tubes were threaded on the ends. The only bit of fabrication would be joining the end of a square brass pipe to the side of another – this would involve drilling a hole into the side of the pipe and cutting the threads with a tap (a tap is essentially a sharp screw that cuts the thread as you screw it in) and then joining the two with a threaded nipple.
Grand Brass carries the 1/8 I.P.S NPS tap and tap handle, which is what you need to cut the correct threads into the square pipes. (NPS is a straight thread and different from the more common NPT which has a tapered thread, and NPS is what you need for lamp making). They don’t appear to carry the applicable drill bit (you need an 11/32″ drill bit as companion for the 1/8 IPS tap), so I got that at the hardware store.
Next was to make sure that Grand Brass carried our dimensions for each brass piece. Not shown, but we did have to change the length of one piece in our initial design to an available length, and again had to change a 7″ to a 6″ tube because they were backordered and we didn’t want to wait. When I ordered, I had selected the option not to ship the order if it wasn’t complete, so Grand Brass called me about the backordered item and I was able to switch over the phone – they were great to deal with and very patient with me the little guy – highly recommend them).
Here is our redacted invoice/parts list, you’re welcome 🙂 The only note is that I also included a die and die handle in the order (3rd and 4th items on the list below), which we didn’t end up using, but I’m sure we will for a future project. A die is the bride of the tap – it cuts outside threads on a pipe/tube. You would need it if you have to cut a round brass pipe to a custom length and need threads on the cut end. 
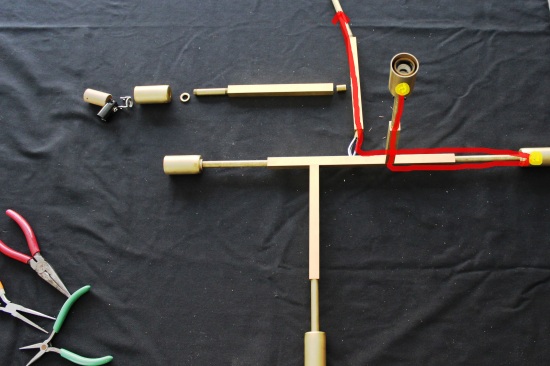
 When the parts arrived, we laid out each pendant on the table to get a visual.
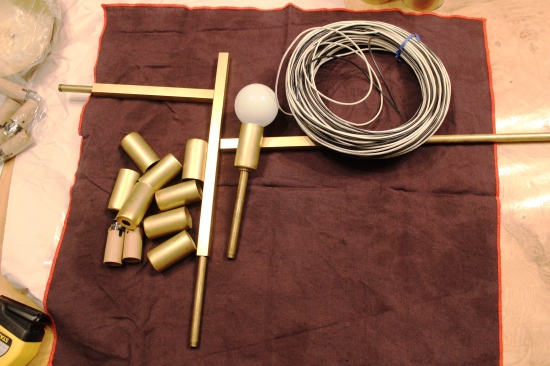
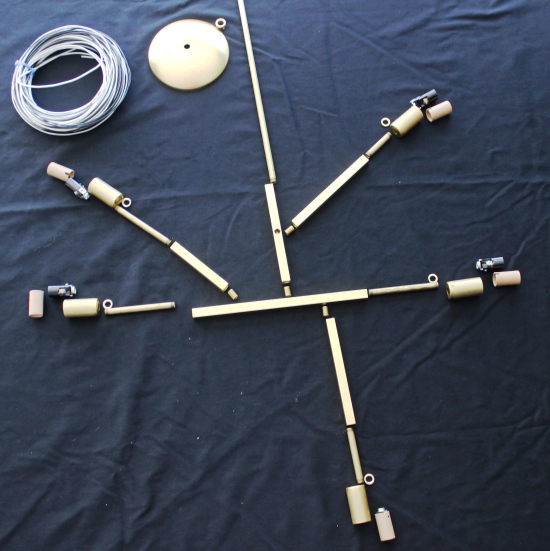 Next task was to drill the holes in the sides of each square pipe where another pipe butted against it.
Before doing that, I got all geeky and did some math, as I wanted to make sure the installed pendant wasn’t going to tilt/lean on one side because it was unbalanced. Even though the rigid installation would help (the long brass tube up to the ceiling box and screwed in, vs. hanging on a wire or chain), if it was significantly heavier on one side vs. the other, it could still lean instead of hanging straight. With all those beautiful straight lines, you don’t want it hanging anything but plumb.
Been a while since school, I’m ashamed to say I looked up math sites for a refresher. Proud to say that it was as I thought. The principle of moments: When an object is balanced (in equilibrium) the sum of the clockwise moments is equal to the sum of the anticlockwise moments. Like a see-saw - the moment (force times distance from pivot) on one side must equal the sum of moments on the other. So I added the moments of each component on each side (weighed each piece and factored center of gravity), played with distances, and ended up with a design that I thought would hold up. All this was to see if we needed to adjust where along the horizontal pipe to drill the holes for arms. Final design wasn’t completely balanced, but it was close enough so gut feeling was that in combination with rigid installation, it would hang vertically. Which it did.
Another important factor to consider before starting: we wanted the pendants to be mirrored, not side by side, when installed. And the front/back branches would be reversed for each pendant. What this means is that drilling the holes on the main horizontal square tube will be different for each pendant, otherwise you will make two identical pendants.
Back to drilling holes. For the first pendant, I measured and marked in pencil the center of the bottom hole (2.5″ from outside end of tube), center for the top hole (4.5″ from outside end of 10″ horizontal square tube), and the side branch (6.5″ from outside end of tube). Note which side the branch is pointing out from – it will be on the reverse side on the other pendant.
Because the square pipes would butt against each other, it was critical to ensure each hole was centered. I did this by a) carefully measuring and marking, b) marking the exact center with a metal punch/hammer to get the smallest drill bit centered in the notch, c) using a drill press on low speed, d) starting with a small bit and working up through three bit sizes until the largest 11/32 bit, and e) using a drop of oil to lubricate the drill bit and keep it cool.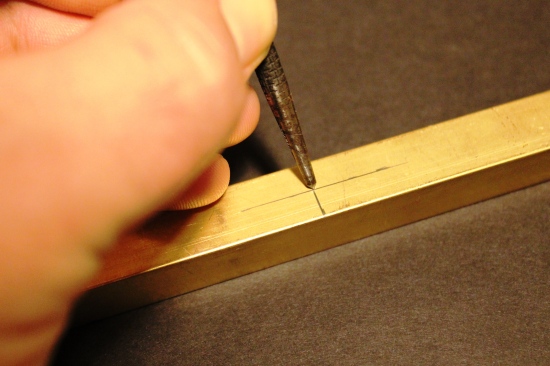
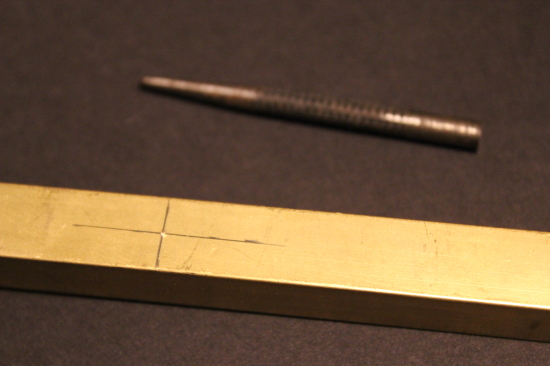
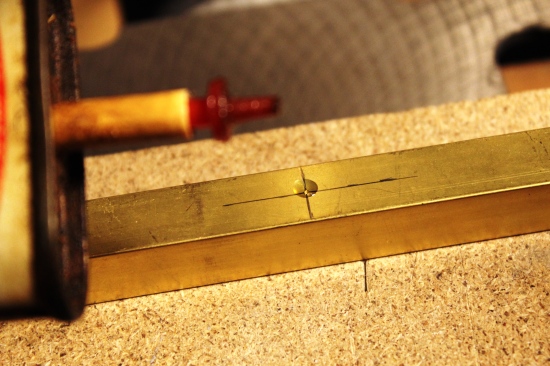
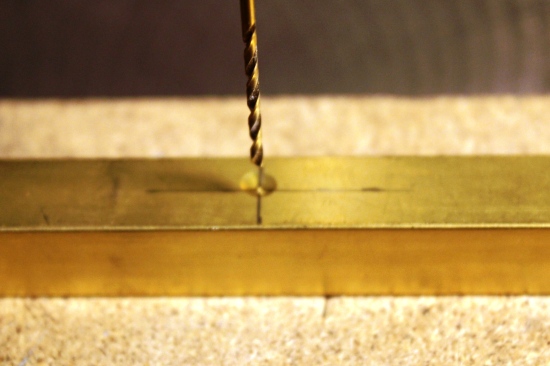
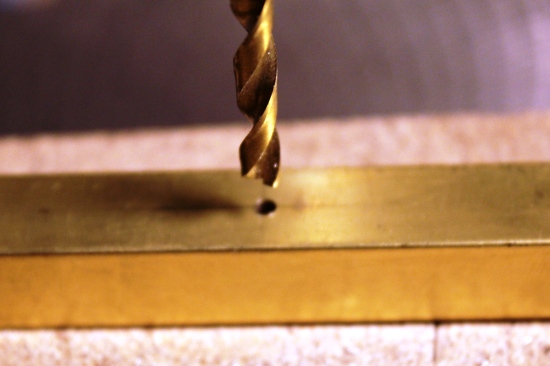
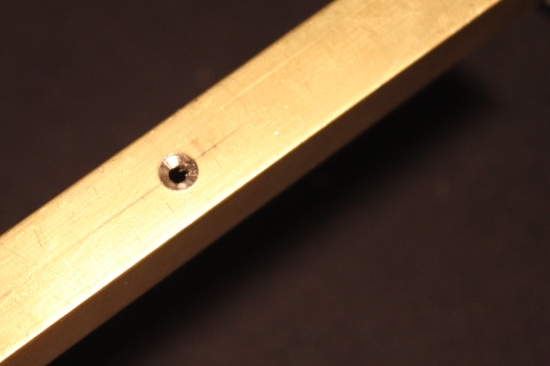
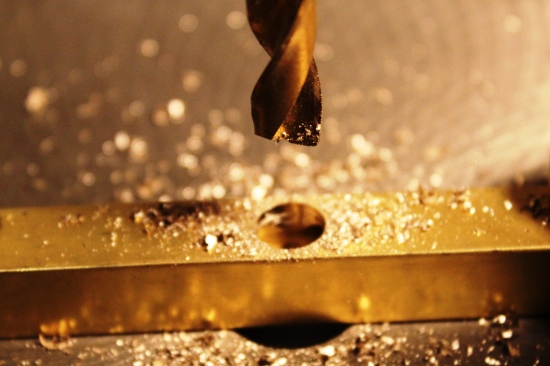
The first pendant was the prototype and so one hole at a time with all those bit changes, but the second went lickity split as I was able to drill all the holes on each piece together, progressively, and then thread them all in one batch, which involved  a whole lot less bit changing.
Now the fun part – cutting the threads. Slow and steady wins the race here…I clamped a square tube, positioned the tap/ handle so it was as perpendicular as possible, and slowly turned the handle clockwise to screw in the tap. Generally they tell you to unscrew a half turn for every clockwise full turn. This cuts off the shavings and helps preserve the sharpness of the cutting tap. Tap longevity sounds good to me. They also say to use oil, but I didn’t because brass is pretty soft compared to steel and I didn’t think it would matter, which it didn’t.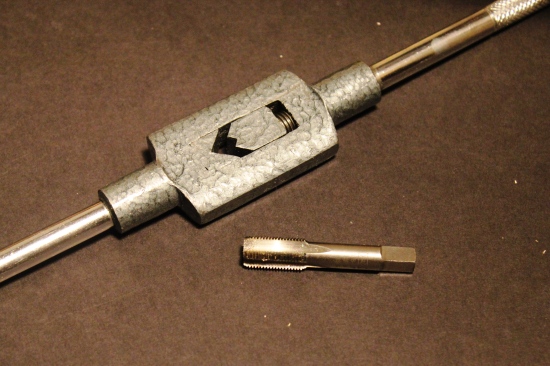
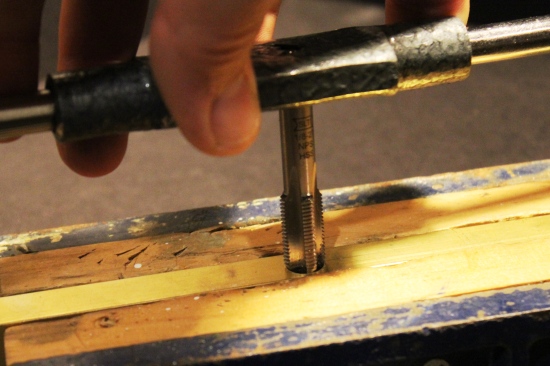
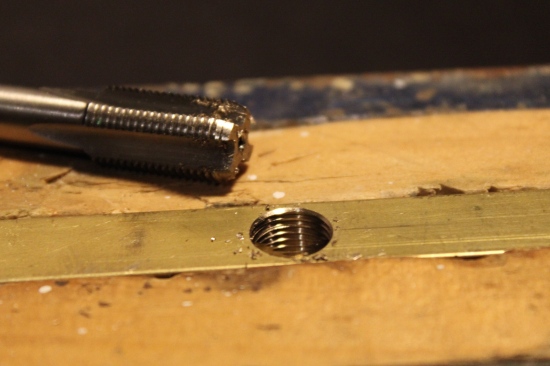
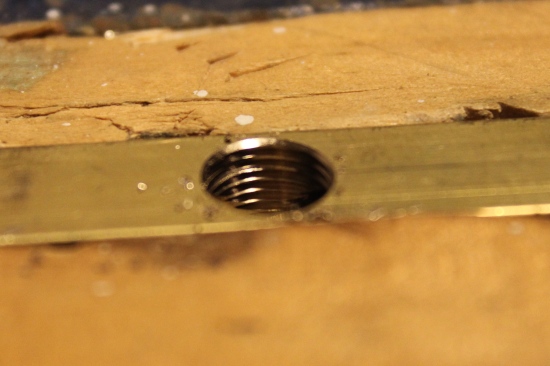 Once all the holes were drilled and threads cut, it was just a matter of wiring and assembly. And so began the wiring puzzle. But before that we assembled one for a dry run, without the wiring, just to play.
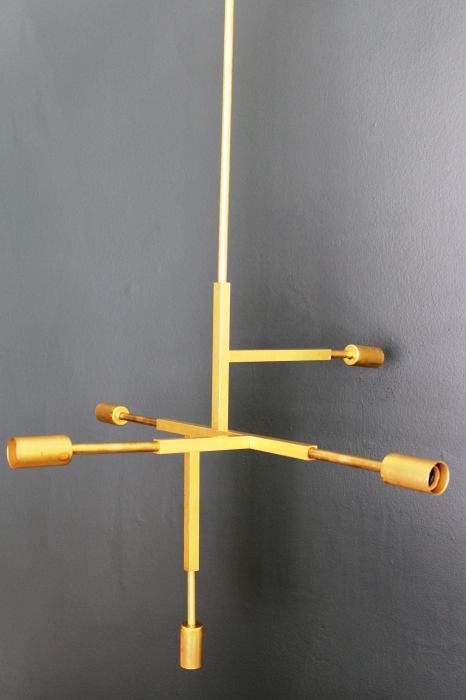 I had ordered the 18 gauge internal fixture wire, insulation rated to 105 degrees C, which is the recommended wiring for lamps. 100′ each of black and white (which leaves plenty for future projects). I found that I could fit 6 wires through a 1/8 IPS pipe, which is 3 pairs of wire. The pendant has 5 sockets, which would be 10 wires, so I wouldn’t be able to run a separate pair from the ceiling junction box to each socket.
So I decided to connect a pair of sockets to each other (did this twice for the lowest four sockets), and then run wiring from one of the connected-pair sockets to the top/ceiling, which along with the wires from the top socket would be a total of 6 wires (3 pairs total) running to the ceiling, which would fit inside the brass tubing. Hopefully this makes sense.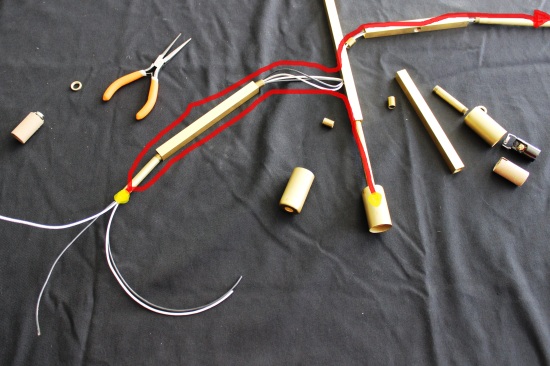 In the picture above, I drew in red to show that I wired two sockets together, and then a single pair of wires connecting them up through the pendant to the top.
Threading the wires was fairly straightforward – I found a push/pull was required from both ends, and long needle-nosed pliers helped pull the ends through the holes.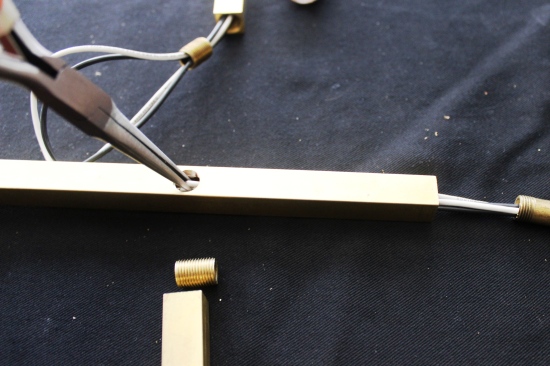 However, there is a lot more to this puzzle than initially meets the eye, and I’m not sure I can adequately explain everything, as I went through a fair bit of trial/error, dead ends, and re-dos, forgetting to thread a nipple, etc. before we were through. First issue is that there is no room for slack in the brass pipes. So you can’t just run all the wires and then attach the sockets, because you need room (additional wire length at the end) to screw the wires to the socket, and this would leave extra wire length when you come to screw the socket to the pipe, but there is no room to push the extra wire into the pipe. So really, you need to attach the socket first and then thread the wires through the tube and screw the socket to the tube so that it’s snug and tight with just the right length of wiring inside. Make sense? I didn’t think so 🙂
Second issue, and this will drive you crazy: every time you screw components together, you will also twist all the wires inside the tube – unless they are free to spin at each end. Twisted wires cause all sorts of problems – mainly that they try to untwist which can cause your joints to unscrew if they are not super tight. They are working against you and cause rage. One possible solution is to pre-twist the wires in the opposite direction, so that when you screw in the joint they will untwist. To do this you need to know how many revolutions it will take to screw a joint together, and do the same in reverse with the wires. And this only works in some cases anyway. Still not making sense? Yup, I thought so. You kind of just have to do it.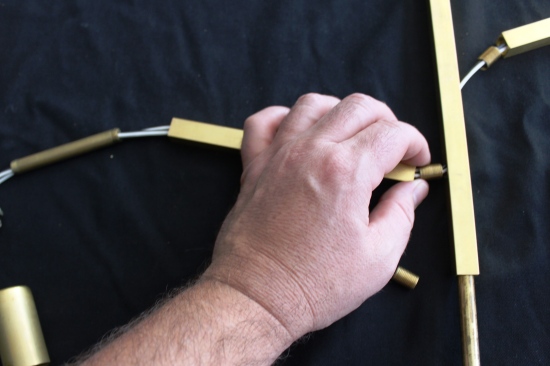
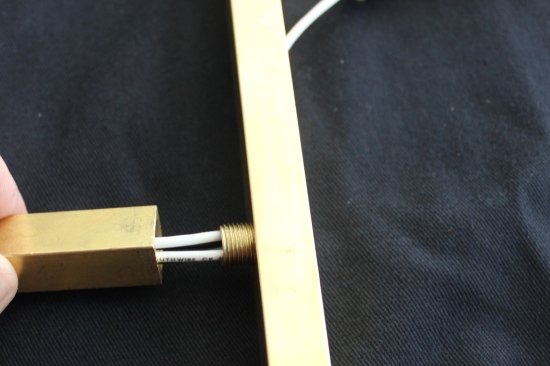
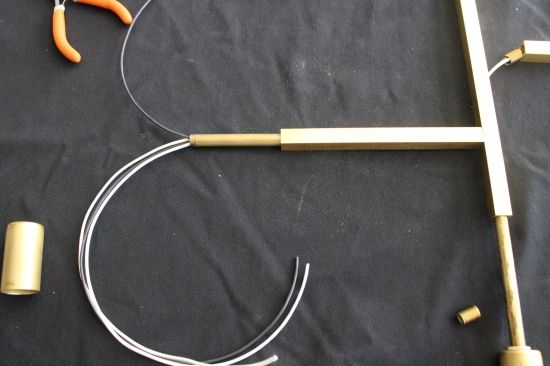
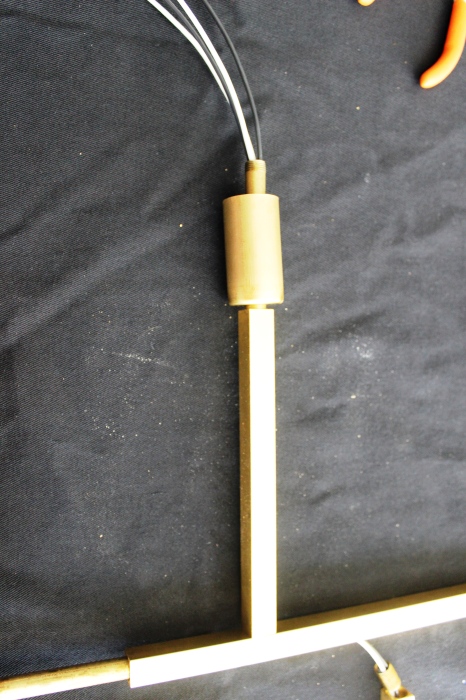 When wiring a pair of lower sockets together, I wired the first socket and then threaded the wire through and screwed the socket onto the brass tube. I found that threading wire/screwing in one section at a time worked best. So far, so good. To attach the second socket I ran into problem(s): I had to slide the socket cup down the tube before wiring the socket (because I had to wire the socket in place due to no room for slack in the tube), which meant I couldn’t use the thin brass nut to hold the cup in place. Also, there was no room to pull the wires through when the socket was screwed onto the brass tube, which it had to be, due to a) no available slack, and b) the wires would twist if it was screwed on after attaching the wires.
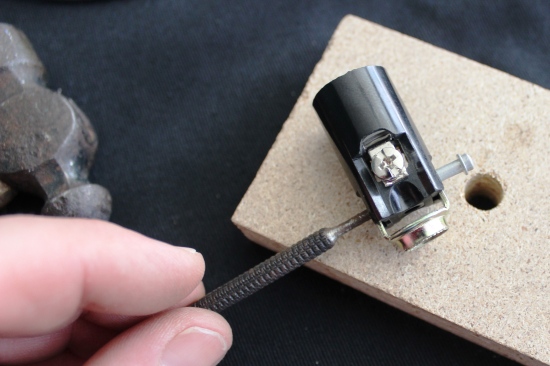
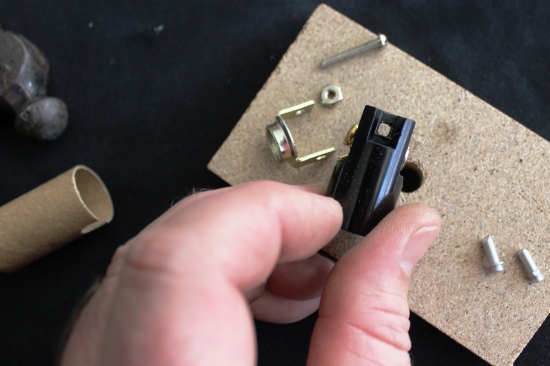
So I had to get crafty here – I punched out the rivet holding the harp/screw piece of the socket that attached to the upper part of the socket…I could now screw the lower piece onto the brass tube, bring the wires through, and then reattach the upper part of the socket with a tiny bolt/nut and secure the wires. There are probably different sockets available that have more room down there, or only a single leg/hickey that would work better, but I had already bought these and so modified them to make it work.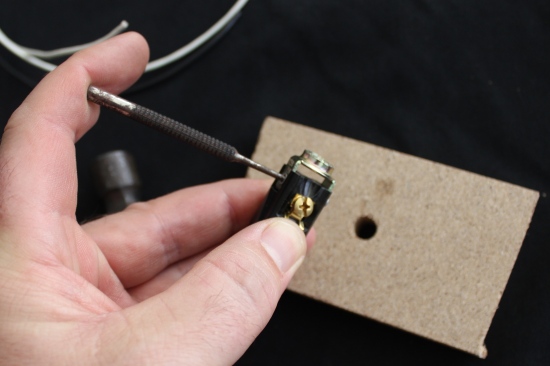
 Â
  Â
 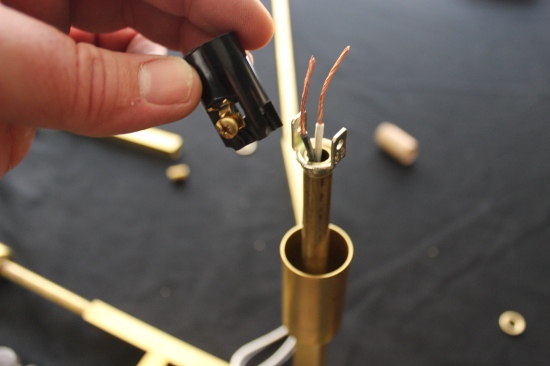
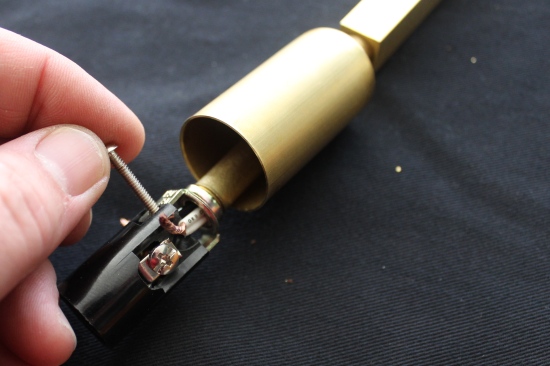
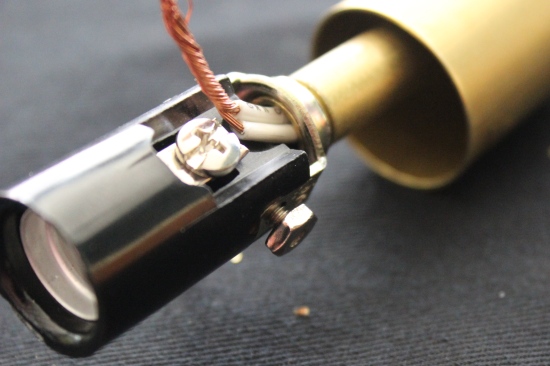 I also had to make the notch bigger on the cardboard insulation sleeve to fit around the tiny nut on the reassembled socket.
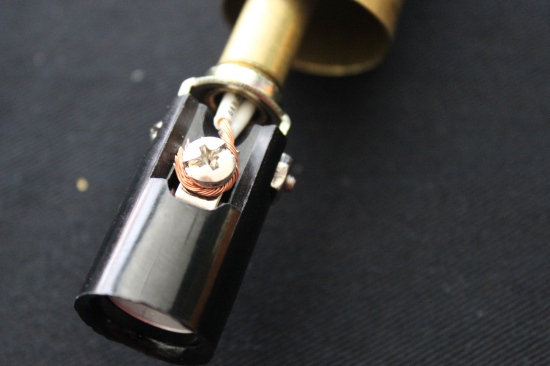
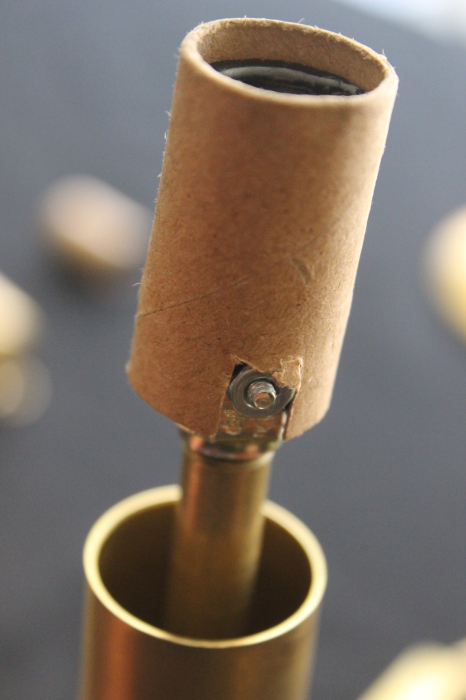
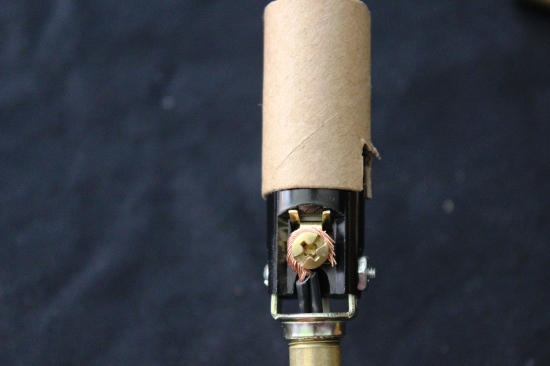
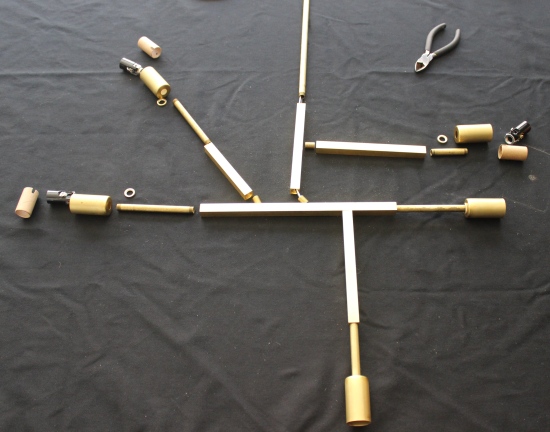 Phew. And that, I’m pleased to say, was the end of the end of the roadblocks…same process for the other lower pair of sockets:
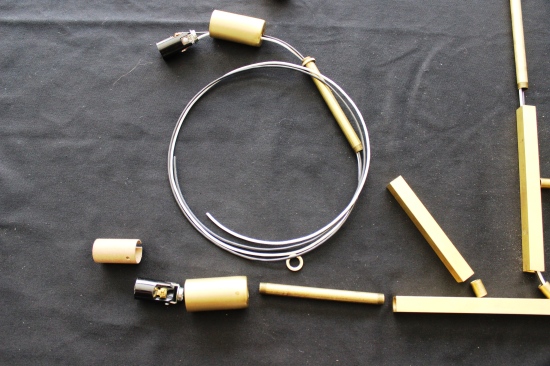
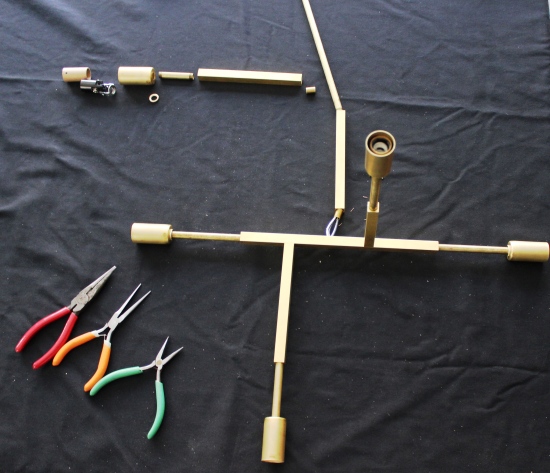 And the final top socket was a breeze – attach wires to socket, feed through to the top/ceiling end, and screw socket to tube.
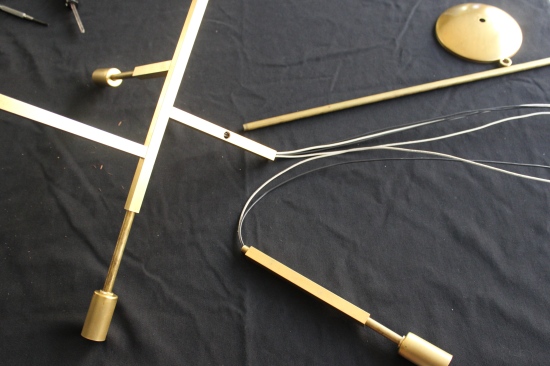 Repeat for the other pendant. When they were done, I temporarily wired the pendant to a wall plug – just to make sure it worked before installing in the ceiling. Hooray.
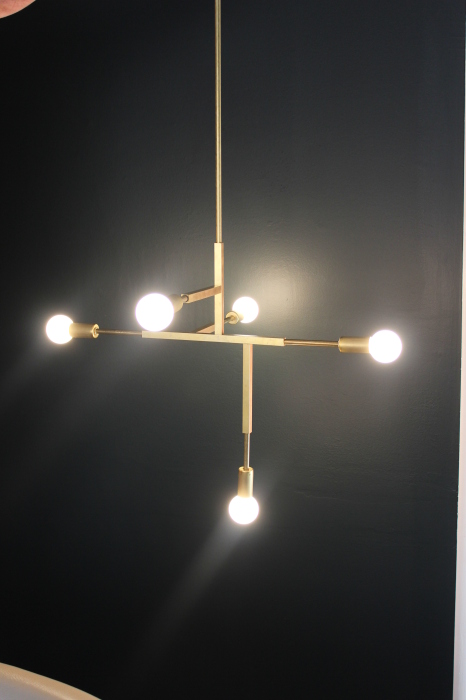 Now for the install. One last issue…we had to take out the previous recessed light cans and replace with ceiling light junction boxes. The can conversion kit wouldn’t work with the canopy size we had bought (a larger canopy would have covered the conversion kit), so we had to cut out a section of ceiling to remove the can lights. Why such a big hole? Because the recessed fixtures were from the 70s and had attachment bars that stuck out further than the joists. BTW, legal disclaimer again – electricity, death, house fire, circuit breaker, electrician, etc.
I kept the drywall cutouts and used them as templates to trace onto the new drywall patches.
I installed two new ceiling boxes, making sure that the center of the box was in fact in the center line of the room.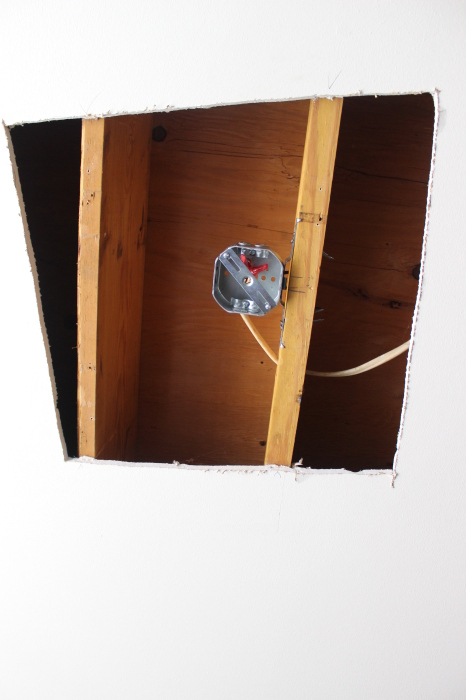 Had a moment of enlightenment here – I taped up some butcher paper over the hole in the ceiling, and then did a pencil rubbing to define both the sides of the hole as well as the junction box.
 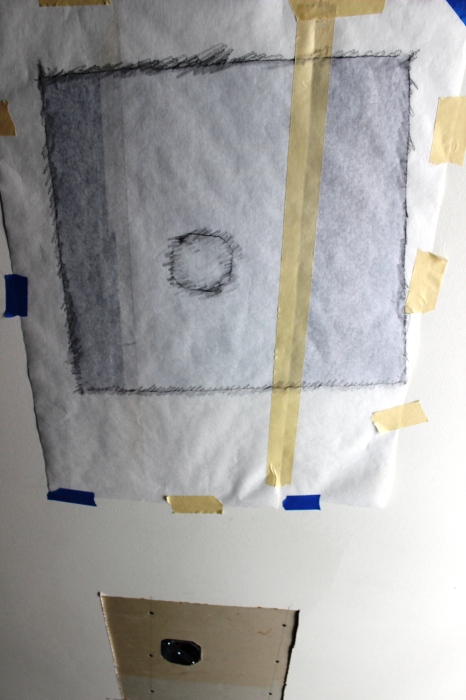 Used this as a template to cut out the hole for the new junction box.
 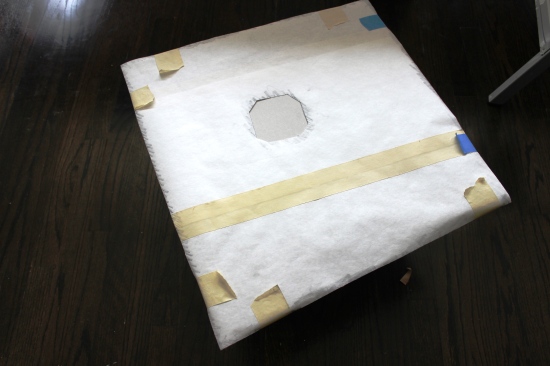 Attached the new drywall patches, multiple coats of drywall mud.
 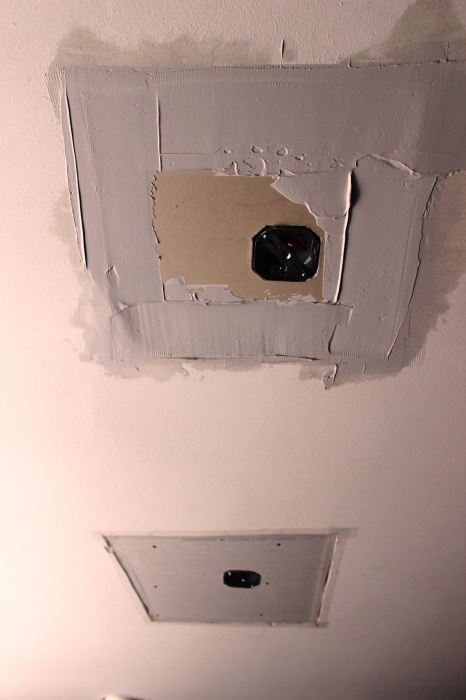 Wet sanded (I prefer wet sanding with a sponge – takes longer but no dust), then primed and painted. Ended up having to paint the whole ceiling as well, but there you go. Fun project and hope the above explanation de-mystifies it a bit for any of you wanting to tackle your own version. Happy to try and answer any questions. Now back over to Modfrugal…
___________________________________________
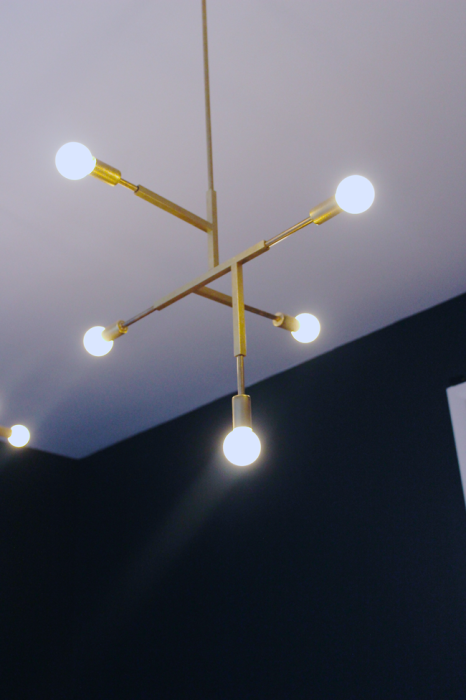
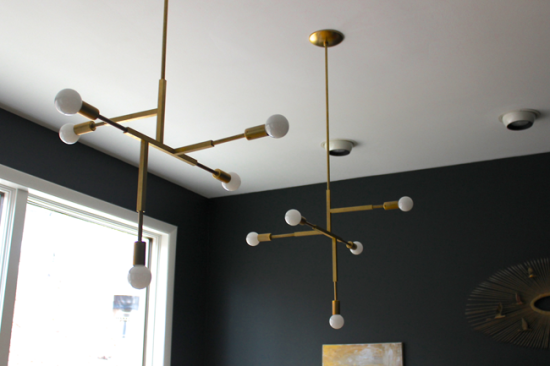
I’ll just show you some photos – I think we’ve yammered on enough!
So there you have it. Our dining room makeover with 2 new DIY chandeliers for about $250 (less the die and handle you don’t need) plus the cost of paint and 2 junction boxes = $320ish.
I think the C Jere impostor metal sculpture may have to move to another room – too much brass methinks – and so the rearranging begins… again.
Update: The CC has also posted an Instructable on the lamps here.
