Driveway Finished-ish

Well, I really didn’t think it would take a year to finish off the upper driveway project, but here we are. Grass grows REALLY SLOWLY in deep shade. Just sayin’.

You may recall, many moons ago, that when we replaced the driveway, there was an area under our huge elm tree where we did not re-pour concrete. It has been a parking pad, and we still needed it, but wanted to minimize stress to the tree’s roots and opted instead for a permeable paver system. Not only does water drain down to the roots of the elm tree, we are maintaining a grassy spot underneath the tire swing – sort of. It turns to mud pretty quickly after the Halloween party, but at least it’s not a slab anymore.

We purchased our paver mats from Landscape Discount which was the least expensive option we could find. We noticed that one of our local parks used the same stuff in their parking area, but instead of seeding it, filled theirs with gravel, so there are other uses besides planting it as we did.

So as a refresher, here’s where we started.

driveway before

driveway scraped Continue reading “Driveway Finished-ish”

Dining Room Refresh + DIY Brass Pendants

modfrugal DIY brass chandelier

Happy New Year! Yeah, I’m a bit late. the bloggaversary came and went, and I was too ashamed to even mention it because, really, why draw attention to the fact that I’m a terrible poster these days. “Hey, it’s been 6 years and I got nothing!”

So here I am, and I finally have something . Yay for not wasting your time?!? It’s a long one though, so come back, or settle in for awhile.

Continue reading “Dining Room Refresh + DIY Brass Pendants”

DIY X Wing Fighter with Fiber Optics

I had a post mostly written about the marbled wrapping paper and it is so very much the WRONG way to do it, and so finicky, it is a fail for sharing. I will do it properly when I get the right materials, but if I told anyone else how I did it and they tried and went through all the mess I did, they would hate me, so for everyone’s sanity – I can’t in good conscience post a DIY that is so flawed. It came out well because I was patient and stubborn, not because it is an easy technique.

The CC, on the other hand, has been a busy man with more translatable success.

DIY X wing fighters Modfrugal

This has been our dining room for the past few weeks as the CC went all out again this year for the annual ornament DIY for the Things. (See, I wasn’t lying about only one corner of my house being tidy.)

FullSizeRender

Behold the X Wing Fighter for 2014, that can fly around last year’s Death Star on the tree. For a complete (insanely complicated) tutorial on how he did it, go to his Instructable here.

DIY X Wing Fighter rear modfrugal

DIY Xwing Fighter Ornament Modfrugal

For past years’ nerdaments (DIY ornaments for nerdy families like us) click here.

The Walken

I KNOW. It’s been so long I almost forgot how to access the dashboard here. So lame.

That said, let’s discuss celebrity, shall we? Specifically, celebrity art.

If anyone had ever asked me if I would have the image of a celebrity in my house, I would have answered “No.” without hesitation. My taste in art has always been a mix of vintage, abstract and family pics, but has never involved celebrity. I think subsconciously my theory was: I don’t know said celebrity, so why would I want them in my house? I hadn’t really thought about it much.

Well, ALL that changed last week when I saw Gina Julian’s fantastic Christopher Walken giclée portrait. He was meant to be mine.

She tells a little of the back story on why/how she made it here. I mentioned to her how much I loved her work, and asked if she would be willing to print another one I could buy, and it turns out she was planning to sell him…so I gleefully snapped him up-after I made her sign her it, of course!

He is perfect. It’s really unsurprising that he can hang in a room with a 70’s orgy sofa.

Modfrugal living room- Walken by Gina Julian

Walken by Gina Julian

CW is in a temporary frame since I have house guests coming in a few days and there was no way I could get him properly framed that fast. The CC put together some window sill molding (it comes already routed with a groove inside for stability-he is mounted on foamcore) so we could get it up right away. A down and dirty $20 solution until we can get it together for realz.

Modfrugal DIY temporary frame  Modfrugal DIY temporary frame

She also just made a David Bowie portrait, with more to come!

Gina Julian's David BowieBecause she’s clever, she is making them available in sizes that fit Ikea square frames, as well as larger, smaller and custom sizes. I knew you guys would want to know how much, so here is her
pricing*:

30″x30″ = $145
22″x22″ = $80 (fits Ikea)
20″x20″ = $65 (fits Ikea)
12″x12″ = $30
*Prices do not include shipping

If you want a statement piece like this – you can find her here and here. She does custom work/sizes too.

A friend of a friend just posted this last week, and I had to share. I think we need a day dedicated to speaking with the Walken comma…don’t you?!

Walken comma

Year Five

Hard to believe. So much has happened in the past five years. The difference in having children aged 4 and 9,  who are now 9 and 14 – it boggles my mind. They were babies when we moved to this city, and now they are big boys, helping with projects and more present in many ways, yet more distant in others. I have not been here much this year, perhaps because of the subconscious awareness of how little time I feel I have left with them?  Another five years and my nest will be half empty!

I always debate whether to keep the site going at this time of year….When I started Modfrugal 5 years ago, Instagram didn’t exist and Twitter was only 2 years old. So much about how we communicate and connect with each other has changed, and sometimes I feel like this site is a dinosaur. My main source of sharing is still through Instagram (@modfrugal), but I will keep it since some things just need a little more detail than 140 characters and a single photo can provide…despite the fact that few people seem to have the time to read blogs anymore.

While the renovations are so few and far between now, there’s still work to be done, but the timeline is just more ambiguous. We are still dying to redo our master bath, so much so that in our desperation for a good warm soak, we rigged up a makeshift bathtub on the back deck last Summer! I only now realized I never posted about it. A stock tank from Tractor Supply, and a little plumbing savvy brought us a hot water soaking tub on the edge of the forest.

modfrugal stock tank bathtub modfrugal stock tank bathtub

modfrugal stock tank bathtub modfrugal stock tank bathtubmodfrugal stock tank bathtub modfrugal stock tank bathtub

Now if we can just get something like this going inside! Winter is when you crave a hot soak the most, but going out there in the freezing cold with an uninsulated tub has not drawn me out yet this season.

After 2 trips to the Atlanta Ikea, we finally got the pantry installed – it was the project that seemed to hang over us for the past 5 years, and once we got started, it dragged on for most of the last 9 months as well.

For the most part though, we spent as much of this past year outside that we possibly could, enjoying what we have managed to accomplish so far. Lots of al fresco dinners, family bike rides, movie nights, and lots of deck time. Several camping trips (and how we pack it all in) and local excursions Tims Ford, Cumberland Caverns/Bluegrass Underground, Land Between the Lakes, Fall Creek Falls, Cashiers/Highlands, that Fall Creek Falls Do-Over and Cataloochee, kept us on the road this year, with the exception of my quick jaunt to Palm Springs.  We are still committed to checking out at least 1-2 Tennessee State Parks a year, so that trend will not wane.

The rest of our projects were mostly maintenance based like re-staining all the decking and revamping the butterfly chairs.

As for screen time – I finally gave this site a makeover, and started a new site, A-Frame Living. Plus, I am still very involved at Thing One’s school, which will be Thing Two’s school next year and there is a website redesign there in my near future as well. Phew!

We’ll see what 2014 brings! One thing I do know is that a sale will happen. I need to make room in the garage for us to set up a corner for a mini pottery studio, so some things need to go and I’m in a paring down and minimizing phase right now – which is good news for anyone wanting to shop. I just have to figure out where and when.

For those who still come visit over here now and then – thanks for saying hi! I know how busy we all are and I appreciate the effort it takes to engage in media these days. I have the best readers who send wonderful emails and share their projects with me. Let’s see what we can get done this year – I can’t wait, and hope to see you around the interwebs!


Pantry Done!

modfrugal pantry reno

This has been one of our more embarrassing renovations time-wise. It’s taken over 5 years to get this done, but it’s FINALLY off the list. To see all posts related to the pantry, click here.

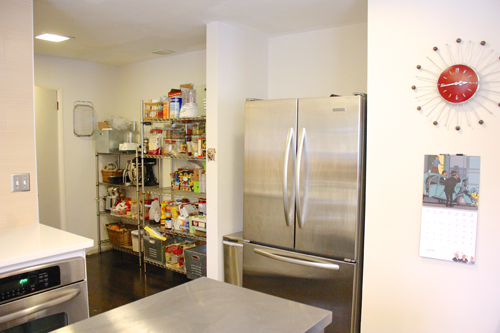
To recap in brief, we gutted and rebuilt our kitchen when we closed on the house 5 years ago, but left the other side of the kitchen like this, thinking we’d get to it within a year. That didn’t happen.

modfrugal pantry reno

Over Spring break 2013, we finally got it going and were making great time to finish within a couple of weeks, BUT…we ran into a snag with the countertop, the overhead lighting had to be changed around, and there needed to be yet another trip to Atlanta for some finishing strips, and eventually, a slab of butcher block. So we got to this point, it functioned, and we came to a screeching halt.

modfrugal pantry
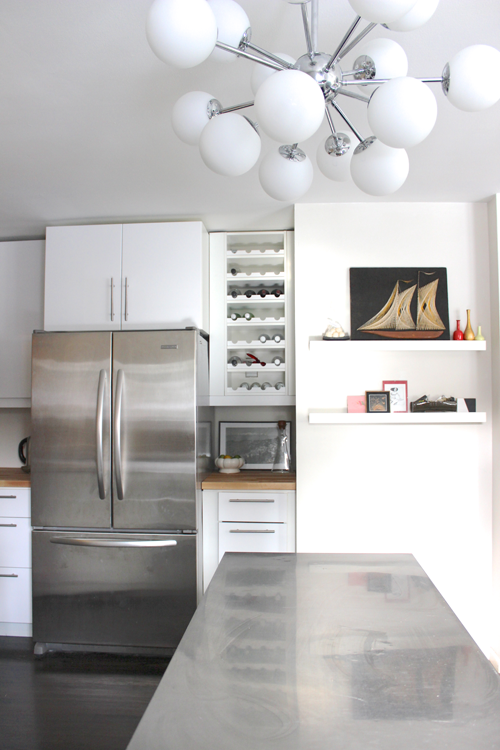
Until we could figure out what we wanted to do, we used the Corian counter top that was in the original kitchen. We had saved it, and had been using it in the basement workshop the past few years. The photo above doesn’t look bad, I have to say, but this one below better shows the color situation.

modfrugal pantry renovationCompared to the crisp white Abstrakt cabinets, the Corian was yellowish. We could have sanded down the Corian, but if we were going with something other than the quartz from the main kitchen, wood seemed the most appealing and least expensive choice. We discussed our options, Summer came and went, and life rolled along with nothing happening in the kitchen for the next 5-6 months.

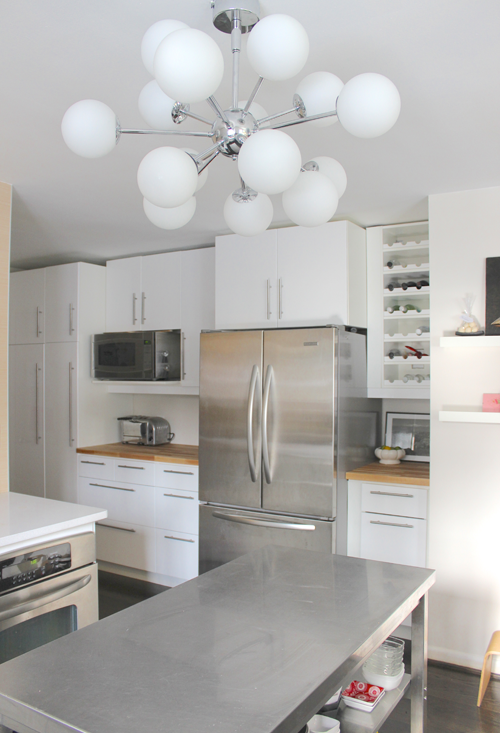
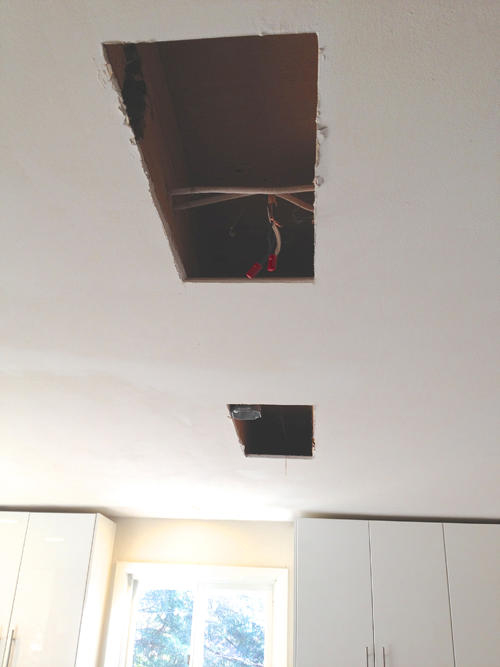
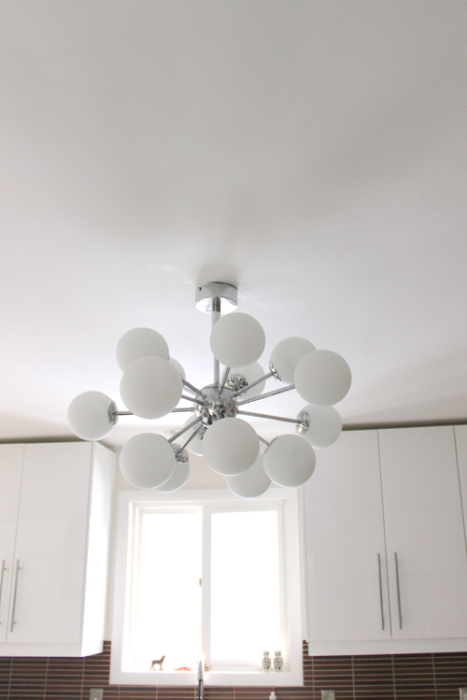
Over Fall break, the CC tackled the beast of the lighting situation himself, which was not an easy task. We still had 3 of the original square recessed lights left in the kitchen and 3 new cans from the main kitchen renovation. I never felt we had enough light over the island/table for prep, and it looked bad to boot. I had always planned to move the sputnik over the island as it is too big to hang in a walkway, but there it was, bumping the heads of our over six foot high friends as they walked in from the back deck. On top of that, we had never finished painting the ceiling in the kitchen because we were going to be tearing it up again any day…5 years later. Of course it wasn’t just a simple swap of fixtures, the depths were different between the 2 styles of recessed lights, so it took awhile and a lot of sheetrock dust.

modfrugal pantry renovation

I can’t even begin to tell you what a difference changing the lighting has made in this kitchen. Lighting is like paint – often underestimated, transforming a space to such a degree you can’t understand why you didn’t do it earlier. We had to repaint the whole kitchen ceiling afterwards, but that’s the price you pay for waiting so long!

But it was worth the wait. We have it on a dimmer, and every time I’m chopping at the table, I am grateful for how much better I can see.

Modfrugal Kitchen Sptutnik

So, now the kitchen is almost done!

Pantry cabinets and counters are in, lights changed. All that’s left is a bit of caulking and some more trim around the desk area. I’ll re-shoot the whole kitchen once that is done….and when all that glassware on the brass etagère gets dusted…gulp.


modfrugal pantry reno

modfrugal pantry renovation kitchen
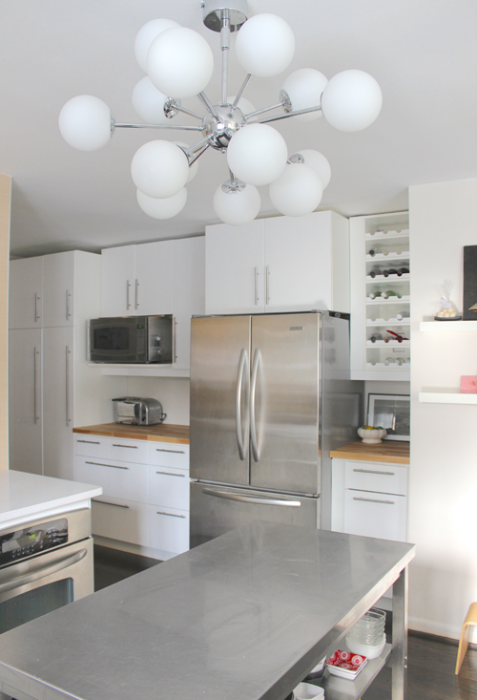
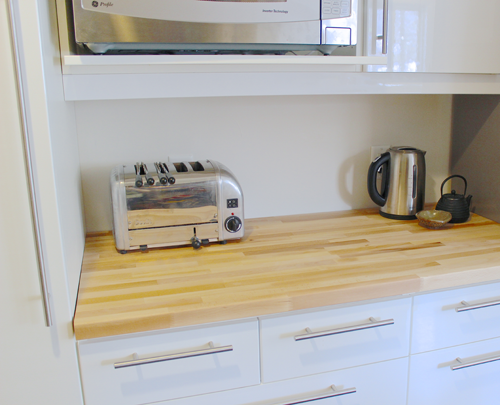
We left the fridge sides exposed so we could use it as a bulletin board for our conversion charts, important phone numbers, etc… This counter is now toast, tea and lunch making central. It has really helped the flow in the main “U” to have these stations moved over.

IMG_1003

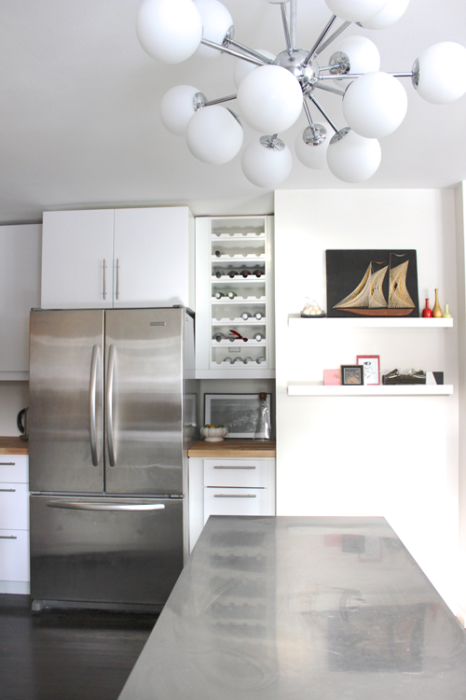
Since we moved the wine rack over, the tiny area to the right of the fridge is now a mini-bar kind of set up.

IMG_0979

So here’s the progression…..previous homeowner to today.

IMG_0569.JPGmodfrugal kitchen reno

modfrugal pantry reno IMG_0976 modfrugal pantry reno

modfrugal pantry reno

Thanks for your patience! Off to boil some water for a piping hot beverage because Nashvillians can’t hack 12 degrees for a high. Brrrrr…