Driveway Finished-ish

Well, I really didn’t think it would take a year to finish off the upper driveway project, but here we are. Grass grows REALLY SLOWLY in deep shade. Just sayin’.

You may recall, many moons ago, that when we replaced the driveway, there was an area under our huge elm tree where we did not re-pour concrete. It has been a parking pad, and we still needed it, but wanted to minimize stress to the tree’s roots and opted instead for a permeable paver system. Not only does water drain down to the roots of the elm tree, we are maintaining a grassy spot underneath the tire swing – sort of. It turns to mud pretty quickly after the Halloween party, but at least it’s not a slab anymore.

We purchased our paver mats from Landscape Discount which was the least expensive option we could find. We noticed that one of our local parks used the same stuff in their parking area, but instead of seeding it, filled theirs with gravel, so there are other uses besides planting it as we did.

So as a refresher, here’s where we started.

driveway before

driveway scraped Continue reading “Driveway Finished-ish”

Driveway, Phase 1-2

So, I am always yammering on about how the next big project will be our master bath, and OH, how I wish it could be, but this house has a way of bumping the jobs we WANT to do with jobs we NEED to do. The driveway had become a situation we could no longer ignore.

We had the original concrete driveway that was poured when the house was built in 1977, and I will list the problems that old slab had going for it.

-The expansion joints were originally filled with wood, that over time rots out, allowing water and critters to enter the scene.

-Two giant sections of that old concrete were cut out and repoured when the foundation was underpinned sometime in the late 90’s. Now, those pieces have settled, pulling away from the house, and again, allowing water to enter under the slab.

-The drain connecting to our gutter downspout, that was installed when the driveway was laid, well, it was the wrong kind…the one with HOLES so that water has been flowing under the slab for decades.

-Aaaaand lots of large trucks driving on it during previous renovations created baby new cracks, to keep the old craggy cracks company. I consider this to be an alternate renovator’s slang for crack baby. You heard it here.

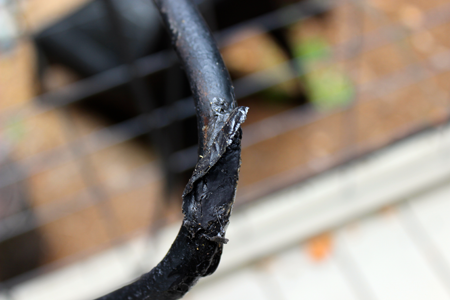
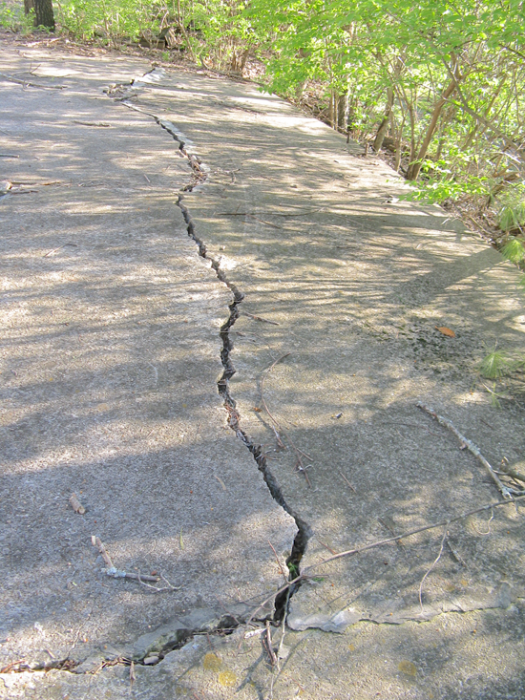
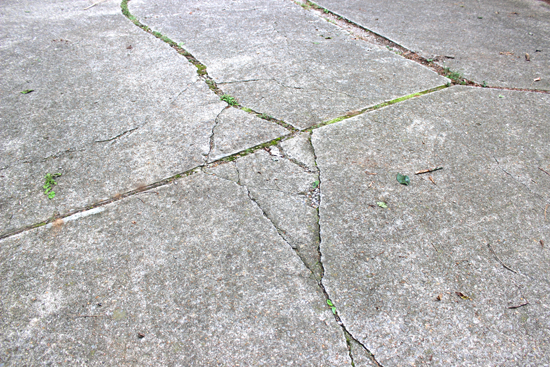
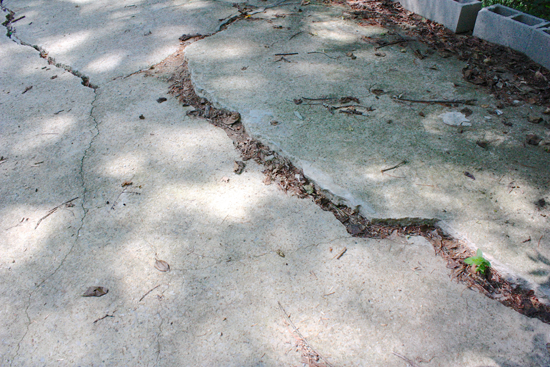
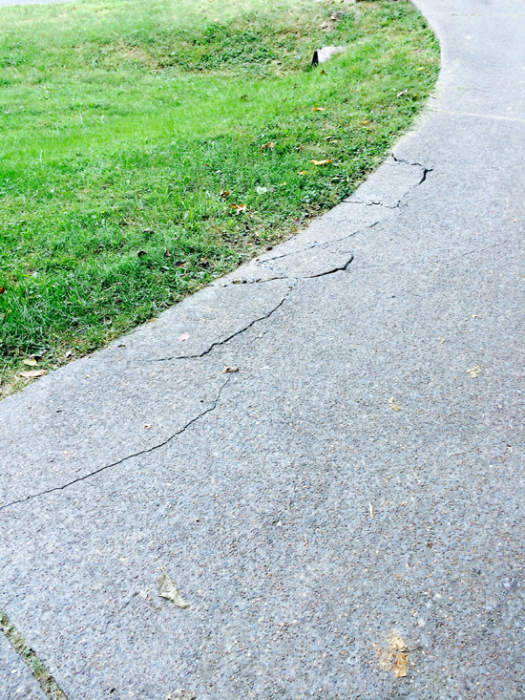
ALL of this equals a nightmare hot mess of cracked concrete. Behold.

Modfrugal driveway Modfrugal drivewayModfrugal driveway Modfrugal driveway

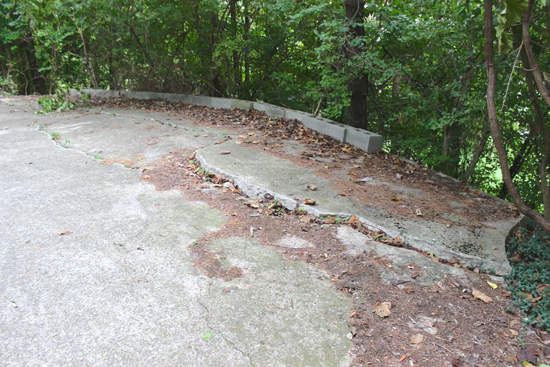
The work was scheduled to start on Tuesday, and we discovered on the prior Saturday that a yellow jacket colony decided to set up a ground hive down in one of the cracks. I mean, REALLY?! Ugh.

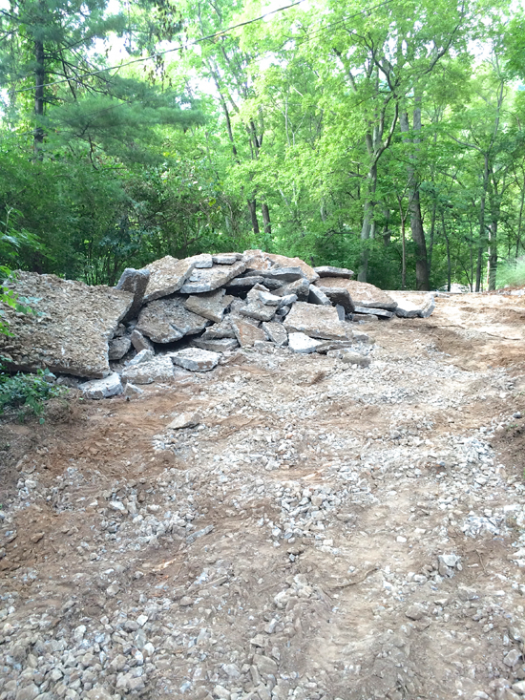
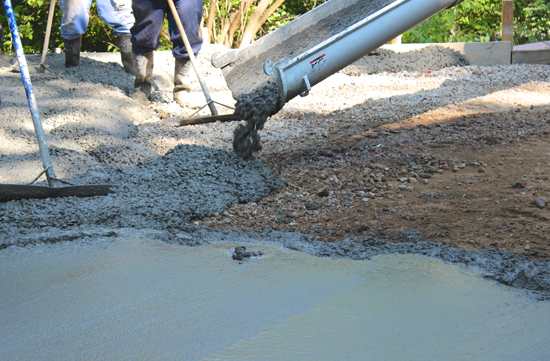
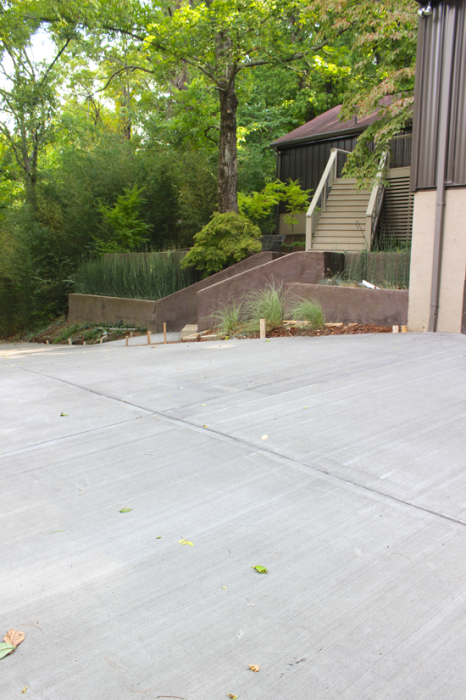
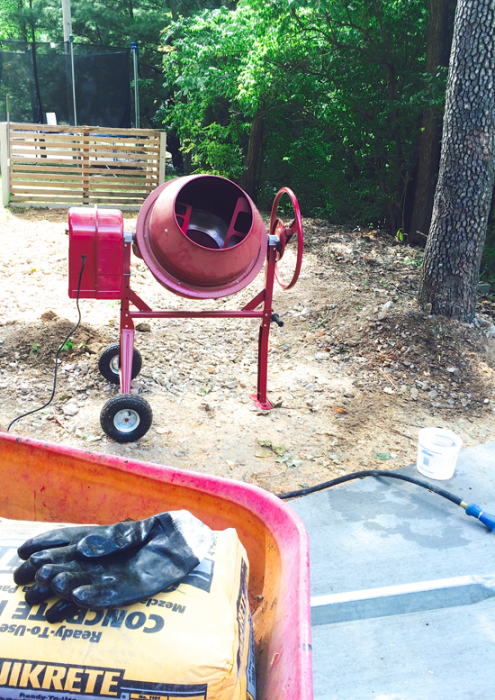
Hive out, and it was showtime!

Modfrugal driveway

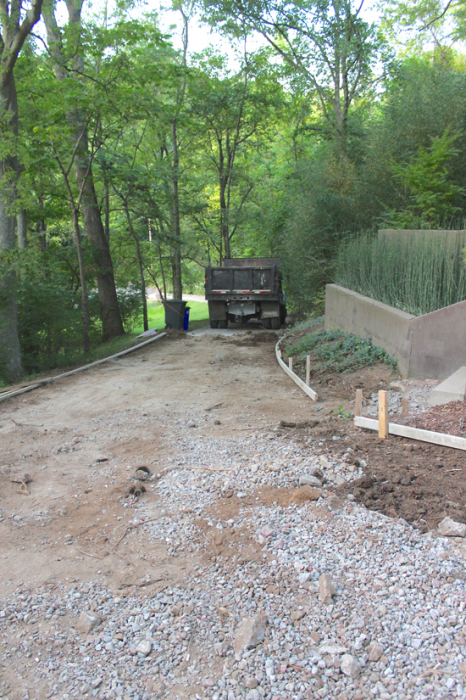
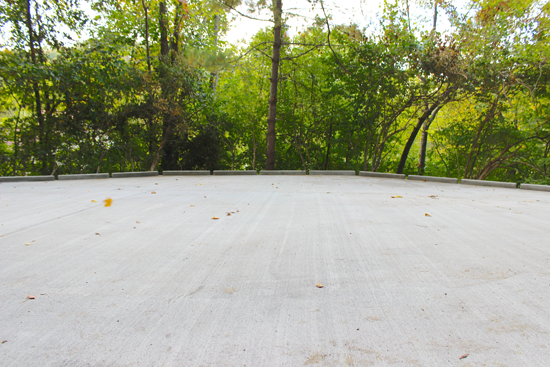
We only replaced the top portion of the driveway and the turnaround. The rest of the driveway is pretty good for its age, so luckily for our budget, the rest can wait. The truck is where the new work stops and joins the old part of the driveway still in decent shape.

Modfrugal driveway


Modfrugal driveway Modfrugal driveway Modfrugal driveway


Modfrugal driveway

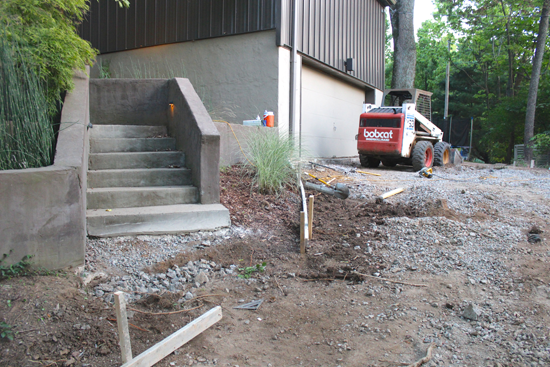
As luck would have it, when the concrete truck drove up the driveway – it broke one of our perfectly decent slabs.

Modfrugal driveway


They very kindly offered to fix it on the spot after the top was poured, BUT, it causes me angst because my inner OCD has a hard time with this…this….Frankendrive. ARGH! Don’t look.

It also created some hairline cracks (more crack babies) in a couple of the other slabs, so I’m sure we’ll have to replace the rest in a just few years…sigh.

Modfrugal driveway

We need to re-pour our garage slab too, but it just wasn’t in the budget, (knowing this job would likely go over budget..and it did) aaaand we have some joint sistering to do in there before we tackle the floor, so it just had to wait. It would have been SOOOO much easier and cheaper per sf to do it all at once, but that’s life without a money tree.

Modfrugal driveway

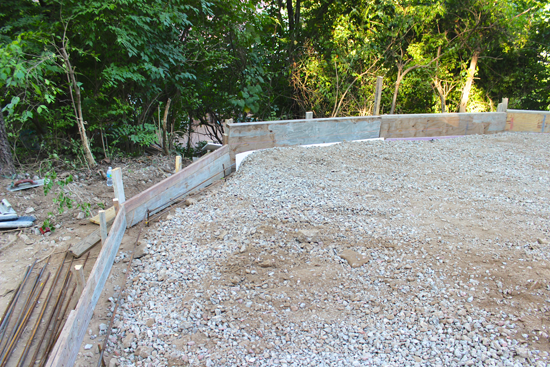
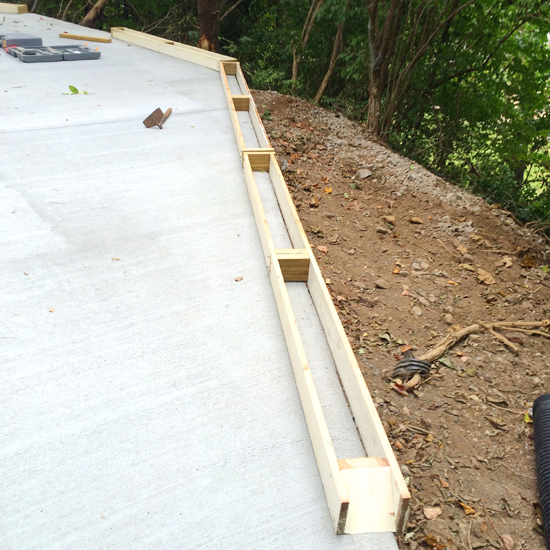
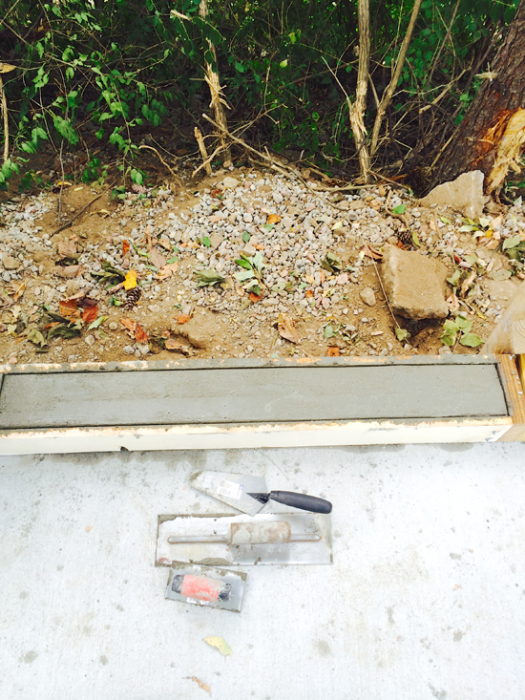
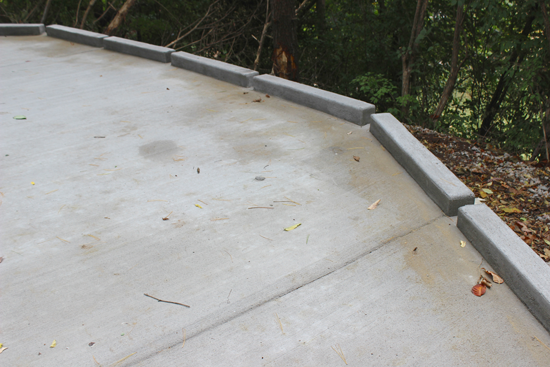
The next phase was a DIY – the CC poured 4 foot curb sections around the far edge so we don’t lose anyone down the hill. We are mildly considerate like that.

Having the curbs poured at the same time was going to add a lot of labor cost, but not concrete cost, so we thought we could handle that on our own. To this point, our driveway has freaked people out since it’s a pretty steep drop-off from the far edge. Example: Our substitute mail carrier won’t come up our driveway at all, and just leaves packages and everything at the bottom of the driveway.

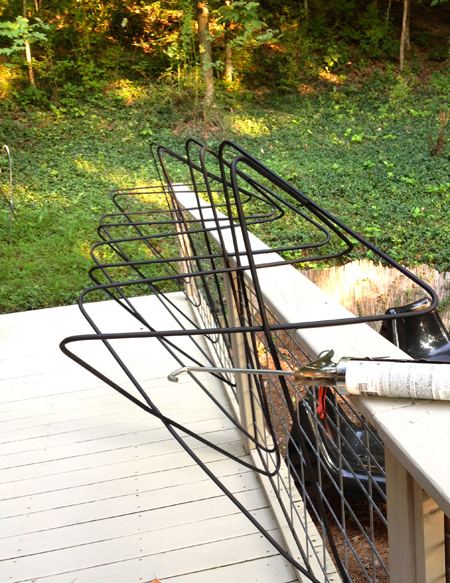
That’s why we had the hideous row of cinder blocks along the edge, plus it kept balls from rolling down into the Nether. The spaces between the curbs allow for water runoff and leaf clearing.

Modfrugal driveway Modfrugal driveway

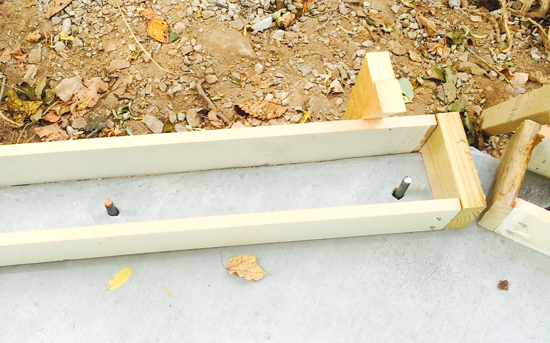
He drilled steel rebar into the new driveway to anchor the new curbs to the slab.

Modfrugal driveway Modfrugal driveway Modfrugal driveway Modfrugal driveway


Modfrugal driveway Modfrugal driveway Modfrugal driveway

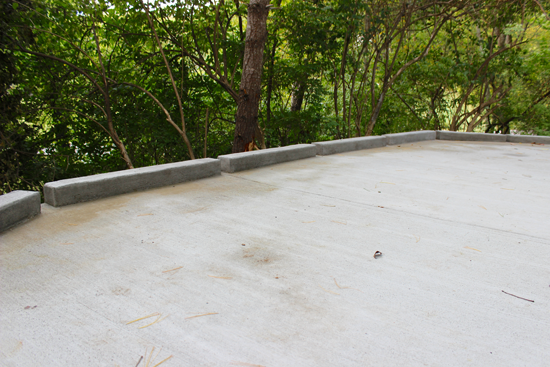
After the curbs, phase 3 is the permeable paver installation- another DIY. We are going to lay down this stuff between the base of the 2 trees behind it. There used to be a concrete pad there as overflow parking for the driveway, but it was hard on the roots of the big ash tree. Hopefully this solution will be friendlier to the tree while giving us the extra parking we need.

Modfrugal driveway

It is a roll out grid that is filled with either gravel or soil and grass/groundcover that allows water to pass through the cells, yet is strong enough to be driven on. Our plan is to seed grass since it is also at the base of the tire swing. Hopefully it will be a significant benefit for both the trees, and stormwater runoff.

Phase 4 will be to put a slatted fence behind the curbs to make those parking and turning around up there feel more secure, and a few years down the road, I guess we will add more sections of driveable grass to accommodate MORE DRIVERS in the household. GULP.

Stay tuned for the paver installation, We have 6 tons of gravel to create the base being delivered Tuesday, so it will be a lot of shoveling and trips up the driveway with the lawn tractor.

WHY you ask?  Because the brainiacs here didn’t think to have it delivered/dumped in place BEFORE the new slab was poured. No trucks on the new slab for 6 months minimum. I’m usually a good renovation planner in terms of sequence, and this was an embarrassing miss. I guess it’s a good work out though….

The Walken

I KNOW. It’s been so long I almost forgot how to access the dashboard here. So lame.

That said, let’s discuss celebrity, shall we? Specifically, celebrity art.

If anyone had ever asked me if I would have the image of a celebrity in my house, I would have answered “No.” without hesitation. My taste in art has always been a mix of vintage, abstract and family pics, but has never involved celebrity. I think subsconciously my theory was: I don’t know said celebrity, so why would I want them in my house? I hadn’t really thought about it much.

Well, ALL that changed last week when I saw Gina Julian’s fantastic Christopher Walken giclée portrait. He was meant to be mine.

She tells a little of the back story on why/how she made it here. I mentioned to her how much I loved her work, and asked if she would be willing to print another one I could buy, and it turns out she was planning to sell him…so I gleefully snapped him up-after I made her sign her it, of course!

He is perfect. It’s really unsurprising that he can hang in a room with a 70’s orgy sofa.

Modfrugal living room- Walken by Gina Julian

Walken by Gina Julian

CW is in a temporary frame since I have house guests coming in a few days and there was no way I could get him properly framed that fast. The CC put together some window sill molding (it comes already routed with a groove inside for stability-he is mounted on foamcore) so we could get it up right away. A down and dirty $20 solution until we can get it together for realz.

Modfrugal DIY temporary frame  Modfrugal DIY temporary frame

She also just made a David Bowie portrait, with more to come!

Gina Julian's David BowieBecause she’s clever, she is making them available in sizes that fit Ikea square frames, as well as larger, smaller and custom sizes. I knew you guys would want to know how much, so here is her
pricing*:

30″x30″ = $145
22″x22″ = $80 (fits Ikea)
20″x20″ = $65 (fits Ikea)
12″x12″ = $30
*Prices do not include shipping

If you want a statement piece like this – you can find her here and here. She does custom work/sizes too.

A friend of a friend just posted this last week, and I had to share. I think we need a day dedicated to speaking with the Walken comma…don’t you?!

Walken comma

HGTV Smart Home 2014

HGTV Smart Home 2014 Credit: Eric Perry © 2014, Scripps Networks, LLC. All Rights ReservedCredit: Eric Perry © 2014, Scripps Networks, LLC. All Rights Reserved

I was giddy to be invited to tour the new HGTV Smart Home here in Nashville and it was a great day out! Looking through my photos, I wish I had been able to get more snaps, but there was always someone else in the room, and as much as we tried to get out of each other’s shots, I found myself focusing on details I was drawn to, rather than trying to get the whole room shot….BUT… HGTV took care of that on their site! To see the whole gallery of photos go HERE.

What makes it a Smart Home?  “HGTV’s Smart Home boasts the latest in home technology coupled with eco-friendly features and energy-efficient design. Located in the Duncanwood Reserve neighborhood, this English cottage-style residence consists of three bedrooms and four and a half baths and features technology to connect the home’s appliances and devices, giving the homeowner better control over energy use, security, interior climate and lighting.” More details on the technology can be found HERE.

It also has a huge TV in the dining room, which I found odd, but I guess that’s what all the cool kids are doing!?

The home is designed by P. Shea Design, built by Carbine and Associates and the interior design is by Linda Woodrum of TS Hudson Interiors. The HGTV House Planner for both Smart Homes and Dream Homes is Jack Thomasson.

I think all of us took this EXACT same shot…what a cute laundry/dog area! Otto would dig this.

HGTV Smart Home 2014 Modfrugal

I like the drama the black tile gives to the upstairs bath.

HGTV Smart Home 2014 Modfrugal

My favorite room was the upstairs den.  Throughout the house, there are touches of Sherwin Williams Indigo Batik, but this room went all in, and I LOVED it.

HGTV Smart Home 2014 ModfrugalThe color is washed out in my photo below, but it was much more like above, rich and bright.

HGTV Smart Home 2014 Modfrugal

HGTV Smart Home 2014 Modfrugal HGTV Smart Home 2014 Modfrugal HGTV Smart Home 2014 Modfrugal   HGTV Smart Home 2014 Modfrugal

One of my favorite pieces of furniture was this shagreen chest being used as a bedside table.

HGTV Smart Home 2014 ModfrugalHGTV Smart Home 2014 Modfrugal  IMG_1048

My favorite piece of art was James Richardson’s “Twin Giants” from York Art.

HGTV Smart Home 2014 Modfrugal

I love getting to tour houses of ANY kind, from estate sales to open houses, so this was a much needed treat! Thanks for having me!

BTW, in case you didn’t know, you can enter to WIN this home beginning April 15! Details are HERE.

Butterfly Chair Makeover

Modfrugal Butterfly Chair Rehab

I have been picking up BFK/Hardoy, aka butterfly chairs for years, and they are showing some wear, plus the last pair I acquired were peeling and rough. While I would still like to get them sandblasted and powder coated, that will cost hundreds of dollars, and I wanted a down and dirty rehab before our last movie night that wouldn’t cost much more than time.

Sanding with 100, then 200 grit sandpaper and spray painting them a flat black did the trick, but my biggest concern was the feet. I finally re-stained our decking, and I didn’t want the metal chairs to leave rust stains on the fresh new finish as they had previously.

Modfrugal Butterfly Rehab

This is what I had all over the deck before I gave it a top coat….


Modfrugal Butterfly Rehab

Annoying, right? The CC thinks I have unrealistic expectations of the deck, when I point out these things, he laughs and says – “It’s a deck, not the hardwood floors!”

No, it’s not, but it doesn’t mean I want our barely 4 year old deck to look trashy already..K?

Modfrugal Deck Rehab

So I did my thing. I had to pressure wash it a second time since our summer was so wet, all the gunk I had washed off this Spring was back, and it took quite a bit of the stain with it.

For those wondering why we stained the deck rather than let it age naturally – we salvaged wood from our previous deck when this one was built, so we had sections of different age etc.. The boards would never look uniform as a whole area, so we stained it for both a cohesive aesthetic, and a way to reflect sunlight in the hot Tennessee summers.

Back to the chairs!

So, my dilemma was that I needed some kind of foot, or moisture barrier for these chairs. I have seen feet where you have to drill into the base of the chair – um, NO, and I don’t actually want to SEE any feet, because I’m picky like that.

So we thought we were pretty darn clever, and decided the best solution was to put black silicone on the bottom of the chairs.

Modfrugal Butterfly Rehab

Modfrugal Butterfly Rehab

Modfrugal Butterfly Rehab

Awesome!!! After sitting in them for a day, we peeked underneath and this is how it had settled in! Problem solved. Now we can start working on something else, like FINISHING THE PANTRY.

Modfrugal Butterfly Rehab

WRONG. After a few more days and a little dragging around, this is what the feet looked like….

Modfrugal Butterfly Rehab

Back to the start. Then I had another bright idea -  for real, this one might work, maybe.

Modfrugal Butterfly Rehab

So we scraped the remaining shreds of silicone off and had a dipping party – twice. Two coats for good luck.

Modfrugal Butterfly Rehab

Modfrugal Butterfly Rehab

Modfrugal Butterfly Rehab

I’m in love. How has it taken me this long to discover the joy that is Plasti-Dip? I want to dip ALL THE THINGS. They have a spray version and I am seriously considering using it on…something, anything, I don’t know, but I’ll find something.

Anyway, it is doing just the job I wanted. It is sturdy enough to handle some light dragging and both deck and chair stay protected. The BEST part is that you really have to look hard to see it, and for resale value etc.. Plasti-dip is completely removable. YES, you read that right. How is it holding up? Why, let me show you….


Modfrugal Butterfly Chair Rehab

Yup. Aaaaand is it noticeable when you look at the chairs?

Modfrugal Butterfly Chair Rehab

You tell me? I’m giddy, GIDDY I tell you.

This will come in handy for all hairpin legged furniture. Protecting hardwood floors, anything – you get the idea.

I should also mention that I ordered new covers from D & J Patio – white “space weave” designed for outdoors. About $20 less than the ones at Circa 50 BUT, they only come in one size. They fit the largest frames the best and we might take in the seam a smidge on our lower set frame covers. I just couldn’t face spending $60+ shipping per chair when I needed 6 new covers.

Another tidbit to know is that they are SLOOOOOOOOW to ship, so establish their stock availability before you order for a particular event. (ours came a full MONTH after ordering). With all that in mind, I am pleased with the quality of the covers and think they are going to work out just fine.


Modfrugal Butterfly Chair Rehab

Modfrugal Butterfly Chair Rehab

Modfrugal Butterfly Chair Rehab

Southern Living Idea House

Hey there! I know I haven’t been here much, but I do have a fun outing to share!

I was lucky enough to get invited to a sneak peek of the Southern Living Idea House in Nashville, and I have to say, I was surprised! Me? Sure, I’ll come look at architecture and interiors anytime!

Reed Brown for Southern Living Idea Housephoto by Reed Brown for Southern Living

The interior design was all done by Phoebe Howard, who was on hand, along with SL editor Lindsay Bierman to give us the grand tour. No photos were allowed inside except for the dining room, since the house will be a feature of their August issue.

For locals, the house opens to the public June 29th until the end of the year, with a portion of the proceeds going to St. Jude Children’s Research Hospital.

Bierman, Howard at Southern Living Idea House: Modfrugal

The concept was  “modern farmhouse”  and I think they did a pretty great job, especially given the time frame they pulled it together: 7 months! I can’t seem to finish my kitchen renovation in that much time, so, well done team.

Southern Living Idea House:Modfrugal

Isn’t that door detail great? There is another one lined up exactly across the house on the other porch from it so you can open it up for dogtrot style breezes. I snapped a few shots for Instagram while there, so you get a mixed bag.

Southern Living Idea House: Modfrugal

While my tastes obviously lie pretty far from traditional, there was a lot to like about this house. The finishes were very well done and the horizontal wood paneling inside and out gave it a rustic, yet refined vibe that could work for a more modern homeowner. The SLIH is actually a series of several houses, like a mini-compound. After the tours are finished, the property will become a boutique hotel type B & B concept on the Fontanel property.

The mix of modern pieces with Howard’s furniture from her line made the space less fussy and thankfully, not at all folksy. That’s always the danger when dabbling in “country” territory. Not a lot of heavy florals and clutter in here. Very little peeling paint too!

My favorite pieces in the entire house are these nesting tables by Madegoods. They are planks of wood encased in resin and they are fabulous in person.

Madegoods Kas nesting tables

The lighting choices were farmhouse appropriate without being overly fussy. This sconce on the porch was a favorite of mine.

Southern Living Idea House: Modfrugal

I guess you can’t have 2800 square feet of porch space without a swing. I sat in it, and it was actually ridiculously uncomfortable. No seat cushion and too many pillows on the sides and back, BUT in the press kit, the photos of the swing show a nice white tailored seat cushion with less throw pillows, so maybe they removed it in case dirty blogger butts messed it up before the press event that evening. You know how filthy we can be.

Southern Living Idea House:modfrugal

The dining room was actually my least favorite space, but the only room we were allowed to photograph. The one thing I liked in that room was the framed kudzu, presented as though it were a coveted biological specimen. Look! It’s Pueraria lobata! It’s nice to see Mrs. Howard has a sense of humor.

Southern Living Idea House: Modfrugal

Things I really liked, but can’t show you…look for them when you visit, or see them in the August issue:

* The 3 bowl farmhouse stainless steel sink that has been bead blasted to give it a matte finish. Great custom piece to meet the codes for a B & B.

* The painting over the fireplace by Shawn Dulaney is a much needed modern statement that makes the room.

* The bathrooms are all classic white marble in various tile size applications with Ann Sacks Andy Fleishman’s Neo Terrazzo floors in the master. The master bath cabinetry is also very well done. Modern and timeless.

* The overall architecture and finishes used. Metal roof, deep porches, solid doors, cable railings on the porches. Nicely built by Castle Homes and designed by Historical Concepts, who were inspired by a 150 year old Leipers Fork farmhouse.

Southern Living’s Pinterest page has a few more photos of the inside, so go there for more sneak peeks!

Don’t worry, my 70’s modern thing is still going strong, but it’s always nice to see other styles done really well.