Reader Mailbox!!

Guys, I got the BEST thing in my inbox the other day, and I am so excited to show you! Adam Crockett was looking for some DIY modern mailboxes and happened upon the very first post ever here at Modfrugal. Guess what he did? He rocked his own modern mailbox!  Check it out!

photo 5

photo 4

photo 3

photo 2

Crockett mailbox

What a great job he did..right?!

Thank you SO much for sharing Adam!! We LOVE hearing from readers like you and feel honored to have provided even a glimmer of an idea.

UPDATE: Reader Wendall Krahn just sent in his mailbox as well…with scrap lumber on hand, his mailbox clocked in at only $60!  Excellent job Wendall!!


photo 1

photo 2

photo 3


Bathroom Update

Above photo added 11.15.12

So we got it done, just under the wire with a few days to spare. Granted, we didn’t go out much at all last weekend to make sure we didn’t fall short of this goal. Progress posts on the bathroom are here.

To refresh your memory on how we started out, here’s a snap of our previous half bath.


I moved my beloved Tretchikoff in here so she can judge all who come to do their bidness.

No pressure.

Those following on Instagram know that I had to do this wall twice. I’m still not thrilled with it, but I’m going to live with it awhile.

What job or photo shoot would be complete without an Otto photobomb? OTTOBOMB.

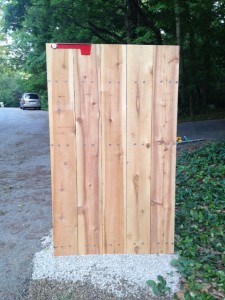
Here, we were trying to mark where to mount it propped up on scrap lumber.

The reason the soap dispenser and faucet are different finishes is simple – we had a hard time matching the Grundtal, so we decided to stop trying and go for contrast.

After multiple sandings, the CC finished the slab with Arm-R-Seal, which is a combination of oil and varnish that gets sanded in over successive coats to fill in any slight imperfections. The oil brings out the natural wood sheen and the varnish protects. After the sanding coats, the last few passes were just a wiped on finish. The recesses in the live edge had to be sealed against water, so multiple applications of epoxy sanded smooth with the wood allow them to show for character.

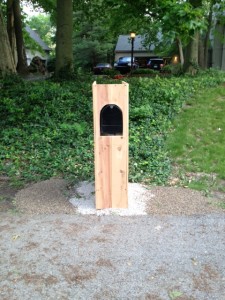
Those wondering how it is supported underneath can have a look-see.

We recycled the old mirror and mounted it lower so that it could act as a backsplash, and the other live edge could be seen.

I got the vintage Lightolier (we think Sciolari but are not positive) from the flea market. New bulbs and a little cleaning, and we were good to go.

And added a dimmer….

The monoprint is by our dear friend David Mah.

I think I want to get a tiny hook to hang next to the sink for the hand towel, but for the party, we just had to roll with things as they were.

The faucet had a tiny leak that dripped onto the counter, and we didn’t have time to fix it before the party, but the CC took it apart and fixed it yesterday…he’s kind of a rock star like that.

Rough Cost: $1000 ($963 plus a few screws and small hardware purchases where we misplaced the receipts)

White Oak Slab $80

Faucet $98

Sink $65

Stainless Undersink Bottle Trap $40

Quartzite Floor/Mortar/Grout & Sealer $425

Toilet $200 (American Standard Cadet with Apron/skirted bottom)

Lightolier Pendant $25

Soap Dispenser $30

Thanks for your patience on this one…we had a lot of fun doing it and are glad to check it off the list. Master bath? Hmmmm. Hopefully soon.

UPDATE: Took another couple of pictures today and I wanted to add my favorite here.

Firewood Shelter Update

The CC has all but finished the shelter.  It’s super simple, but it will make this whole process of retrieving and storing SO much better. We are debating staining the wood, or just leaving it to grey down.

We already had the 2 log racks with these brown covers, but it just never really worked with the wind and rain, especially once the wood got low. The cover would sag and hold water etc…

He’s been talking about wanting something better since we moved in, so it was time.  Now our wood can season over the summer in its new, fancy house. The Woodhouse? Woodshed? Yikes! No, it can’t be that. There’s no switching or woodshed treatment here, even if it is Tennessee.

Anyway, here’s how it went.

So once the roof was up, you could still see the ugly of our air units.  Plus the wind and rain blow straight into this direction, so we cut up the old tarp that used to be on the log holders and added grommets to make easily removable walls to the structure. We left the sides open for air circulation.

Excuse the mess all around..it’s a work zone!

Those side brackets give it extra stability from the wind.

Shall we peek inside?

Just as this was getting finished, the electric company cut down a Hackberry tree in our front yard and left the big pieces of wood laying in our grass for about 5 days. The CC decided it was a good opportunity to refresh the stumps at Camp VÃ¥gö. Making the lemonade people…making the lemonade.

He headed down with the chainsaw and tractor and brought back these!

Fresh!

And the old stumps are now perfect for splitting and storing for winter.

Yes, my man is a lumberjack, and you can’t have him.

It is filling up quite nicely.

looking from herb garden toward the deck/camp vago

HemLoft

As one who appreciates treehouses, I was reading about commando tree dweller Joel Allen in this article and then snooped around his website last night right before bed.

Amazing craftsmanship, and a great story…although I have a hunch it isn’t going to end well.

Despite all the wonders I saw of how he conceived and built this place, and the beauty of his secret, illegal location…all I could think about as I came in and out of sleep in my dreams last night was HOW DOES HE SLEEP THERE? NO ONE CAN SLEEP IN A CURVE ALL NIGHT. SURELY A HAMMOCK?!!?? This snapshot of crazy is why I don’t watch crime/police shows after 9pm…it gets into my head and then I’ll dream all night of the murdered kid on Criminal Minds…btw, there’s ALWAYS a kid involved somehow and I hate them for it.  I digress.

I looked at every photo and video, and while we can see he manages to cook there….NO SIGN OF SLEEPING. More importantly, why does it bother me so much? I’m sure there’s a simple answer, but last night, I NEEDED to know.

Go check it out and tell me how he AND his girlfriend can sleep in there.

Treehouse Update

I believe I might have mentioned a barn door recently? Well, we didn’t do all that well documenting the door construction, but you’ll get the gist. We did get the Tractor Supply hardware we had mentioned before.

The CC basically took the same siding used on the treehouse and nailed it to a frame he built to size, so that when the door is open, it won’t cover the window strip.  Instead of using the brackets that came with the door hardware to hang the box rail, we mounted it onto our cantilevered beam that houses the bucket pulley.

The CC nailed up a couple of temporary support brackets to aid in installing the big beam that will house the hardware.

We mounted stops to keep it from sliding off into the forest….

We are still deciding about floor guides.

Having a proper door makes it feel much more cozy and homey inside…paint coming soon I hope!

Bad shot.  Inside view…a handle to slide it shut and the bottom beam wrapped in flashing….

We’ve been starting to add some more minor details to the lair……

Ahoy!!

Thing Two made his own sculpture that he wanted to incorporate into the treehouse, and by pure luck, it fit perfectly between the beams as a shelf.

Which now is home to his slingshots and ammo….

When the hammocks aren’t in use, they hang up in the corners.

We are slowly adding shelves to gain some much needed storage for the stuff they want up here.  We can’t let them keep snacks up here b/c the raccoons would break in and trash the place (our raccoons can remove bungee cords from garbage cans-crazy skills).  Bottles of water are OK though.  Games and other activities now have a place.  The fans hangs up high when not in use to keep it out of the way.

It always helps to keep track of time.

We are resisting any outer hardware for the barn door to give it more of a “secret door” feel…by putting your fingers in the grooves, you can pull open the door without hardware.

More shelves are going up, and hopefully we have time to paint inside soon before the weather turns cold.  For new readers, previous posts on the treehouse can be found here.

Treehouse Update

Safety first kids….er, um, in our case, almost dead last.  At least we got there, right? RIGHT.

The hog panel railings are in, as is the handrail on the looong ladder.

We are debating the pipe finish.  I’m in the camp of letting it rust and age a bit, then clear coat to seal the patina.

So what does this milestone mean?  More than it looks like because now, I feel it’s OK for the Things to have friends come and play in the treehouse.  Without these key safety features, there had to be adult supervision for friends to climb up and check out the progress.

Railings = Freedom!

It wouldn’t be a proper structure without the bucket/pulley dealio, now would it?

Just in time for the weekend.  When their buddies come over, I’ll fill the bucket with their snacks so they can hoist them up for a feeding frenzy.