The latest issue of Dwell had me nodding my head vigorously as I read the cover “Why are the world’s best houses in Australia and New Zealand?”
The Aussies have also got this building material I’ve been trying to source in the US – unsuccessfully, so this is a call for help if anyone knows.
The magic I’m after is concrete crib walls and concrete “sleepers” or rail ties. Concrib in Australia makes the crib wall retention systems I’m so fascinated by – they are used in big commercial projects such as highway bridge erosion control. Engineering genius- and I think the look is stunning – softer than solid hardscape.  The other option I seek is the concrete sleepers. The photos of those here are from Modular Concrete Sleepers and Boonah Landscaping.
I have a retaining wall situation in my 70’s modern home with a 6 foot high tower of crumbling, chipmunk infested, rotten wood sleepers.  I especially like the sleek joining of sleepers with the metal beams. Anyone who has some knowledge to share will be my hero.
I really wanted a Karl Springer lucite table, but kept getting outbid by interior designers on e-bay every time a good one came around. So I gave up that approach and started thinking about how I can finagle a new glam coffee table for no more than $200-$250. I found the lucite base on e-bay – came with a giant glass top that made it look oh, so 80’s…but I was able to purchase just the base.
Next came making our own top….In discussions with my crafty counterpart – he decides 2 pieces of MDF glued together is the perfect base on which to apply our veneer. I went to the local woodworkers shop and picked out a nice piece of zebrawood veneer – from there, we built the tabletop to be the exact width of the veneer so we won’t have any seams on the top. We cut small strips to use on the sides and left the underside alone. Sealed with a few coats of polyurethane and it’s done.
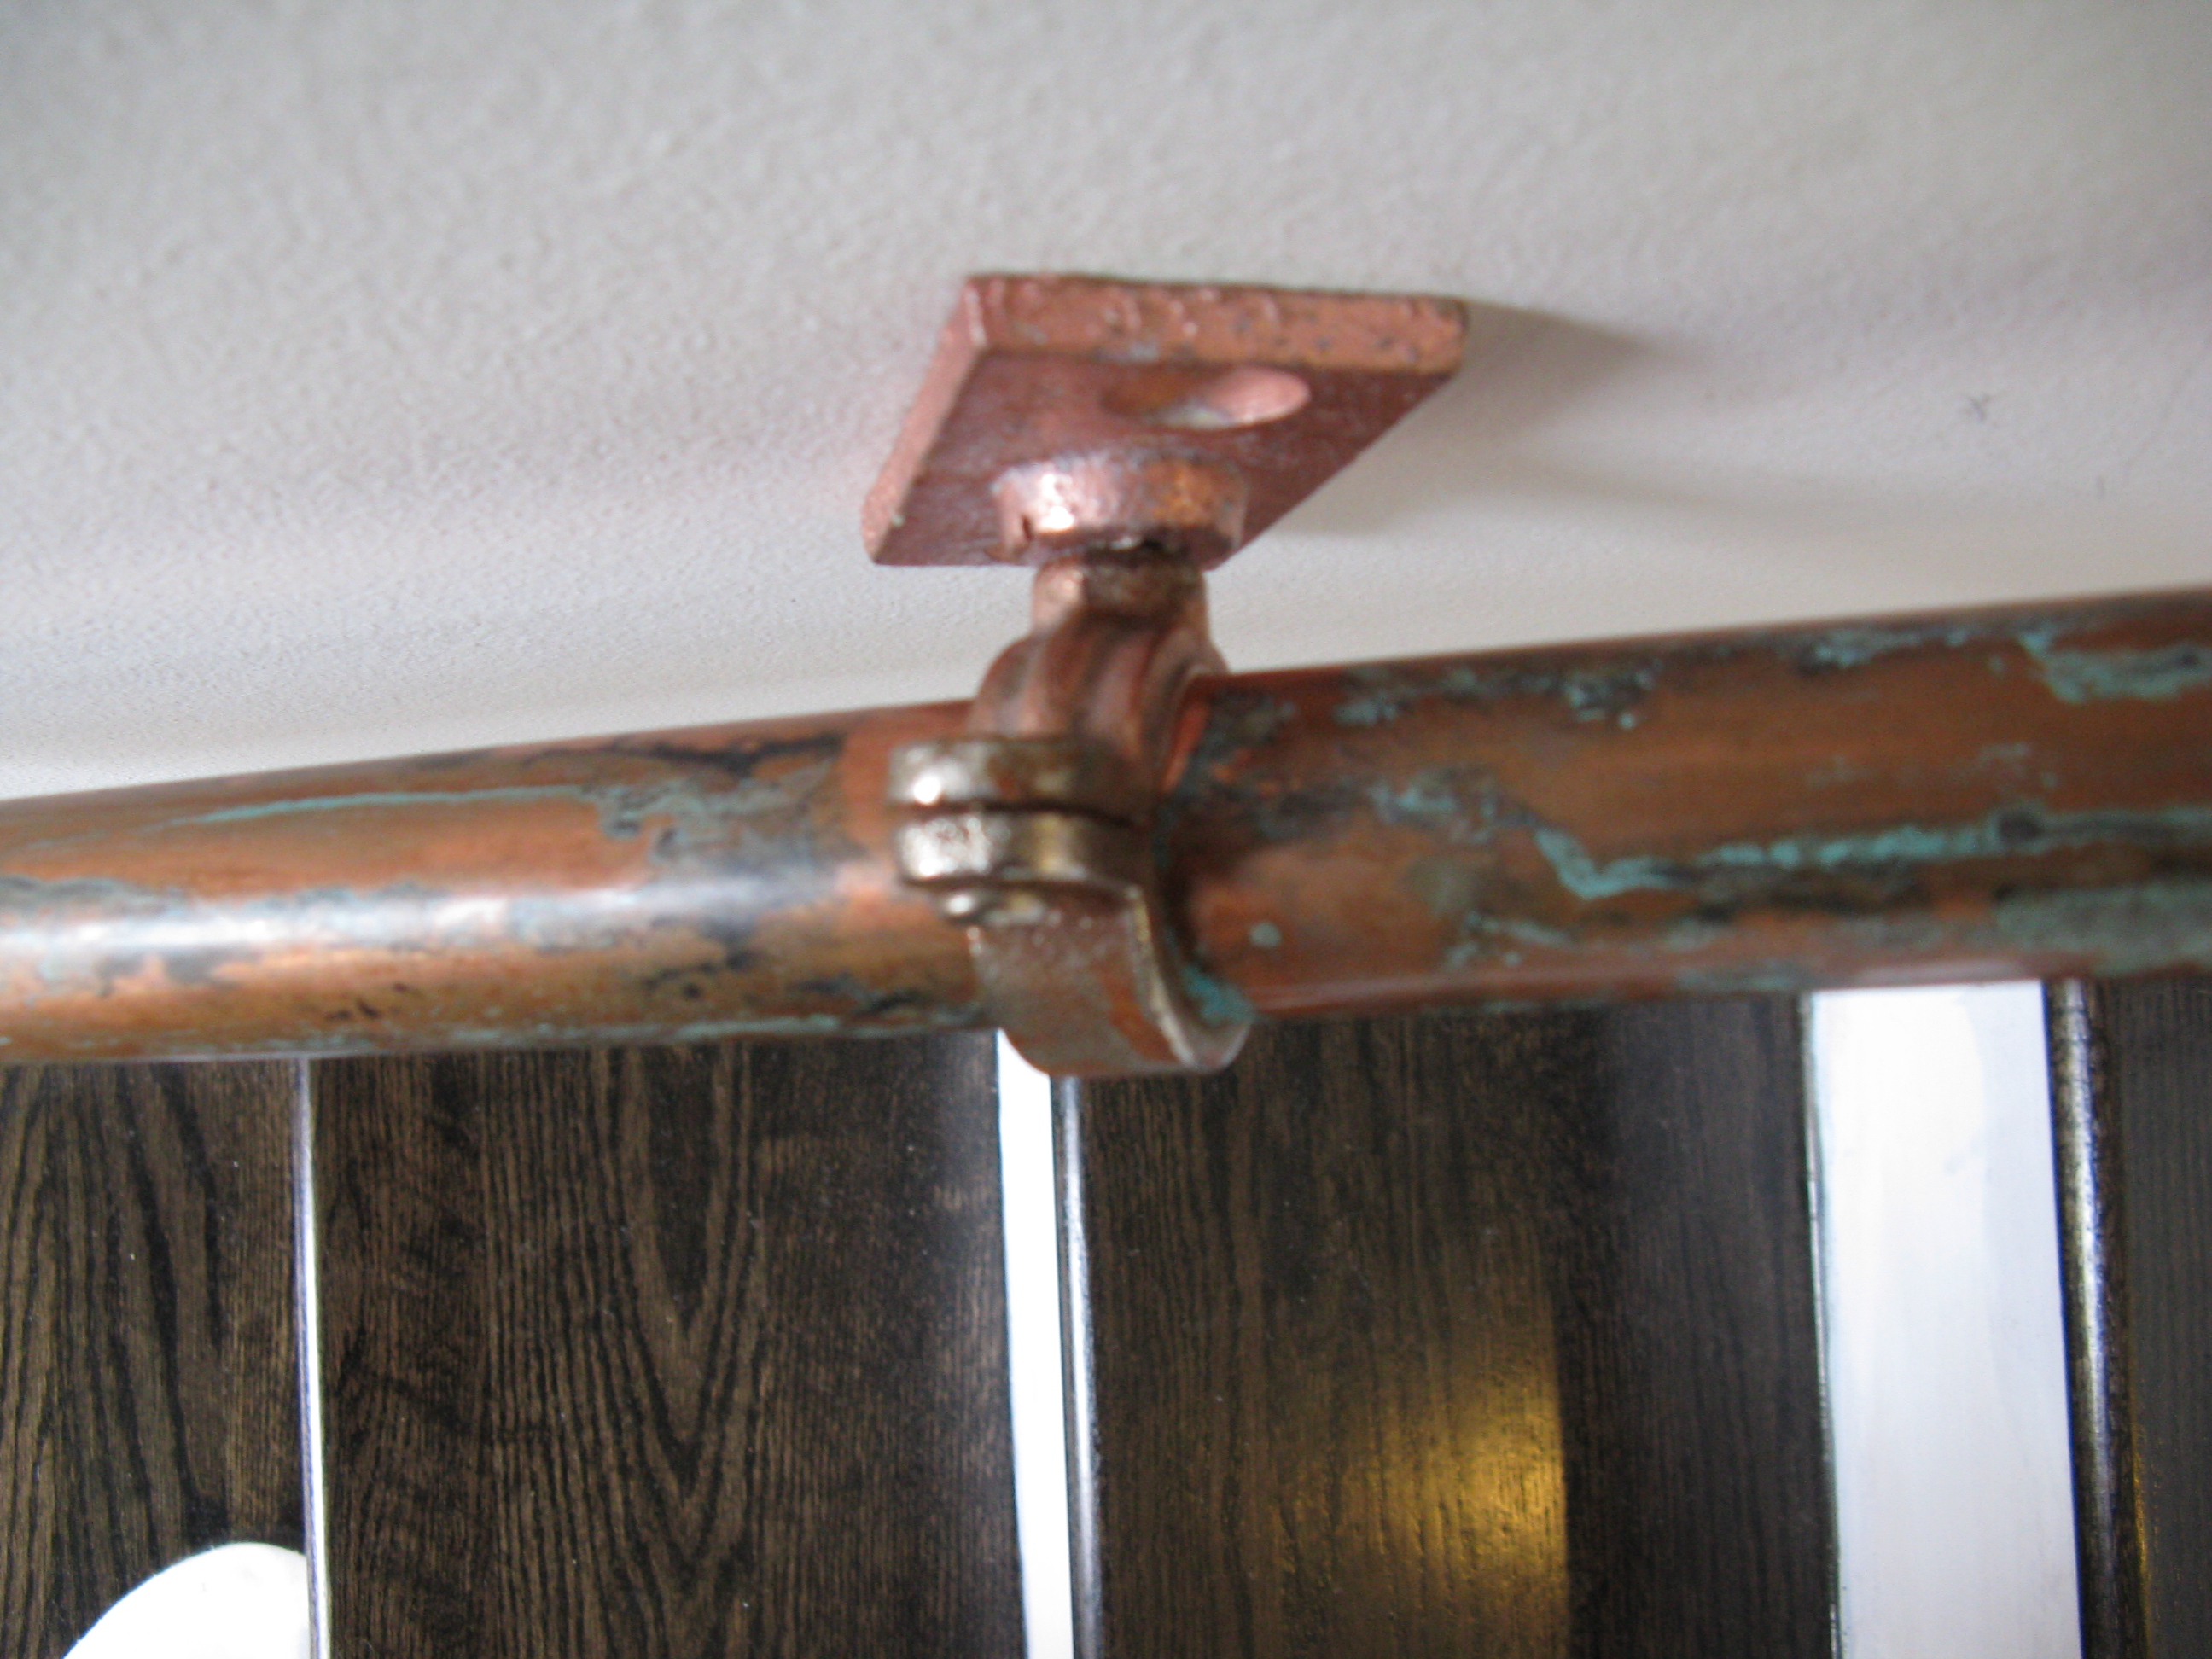
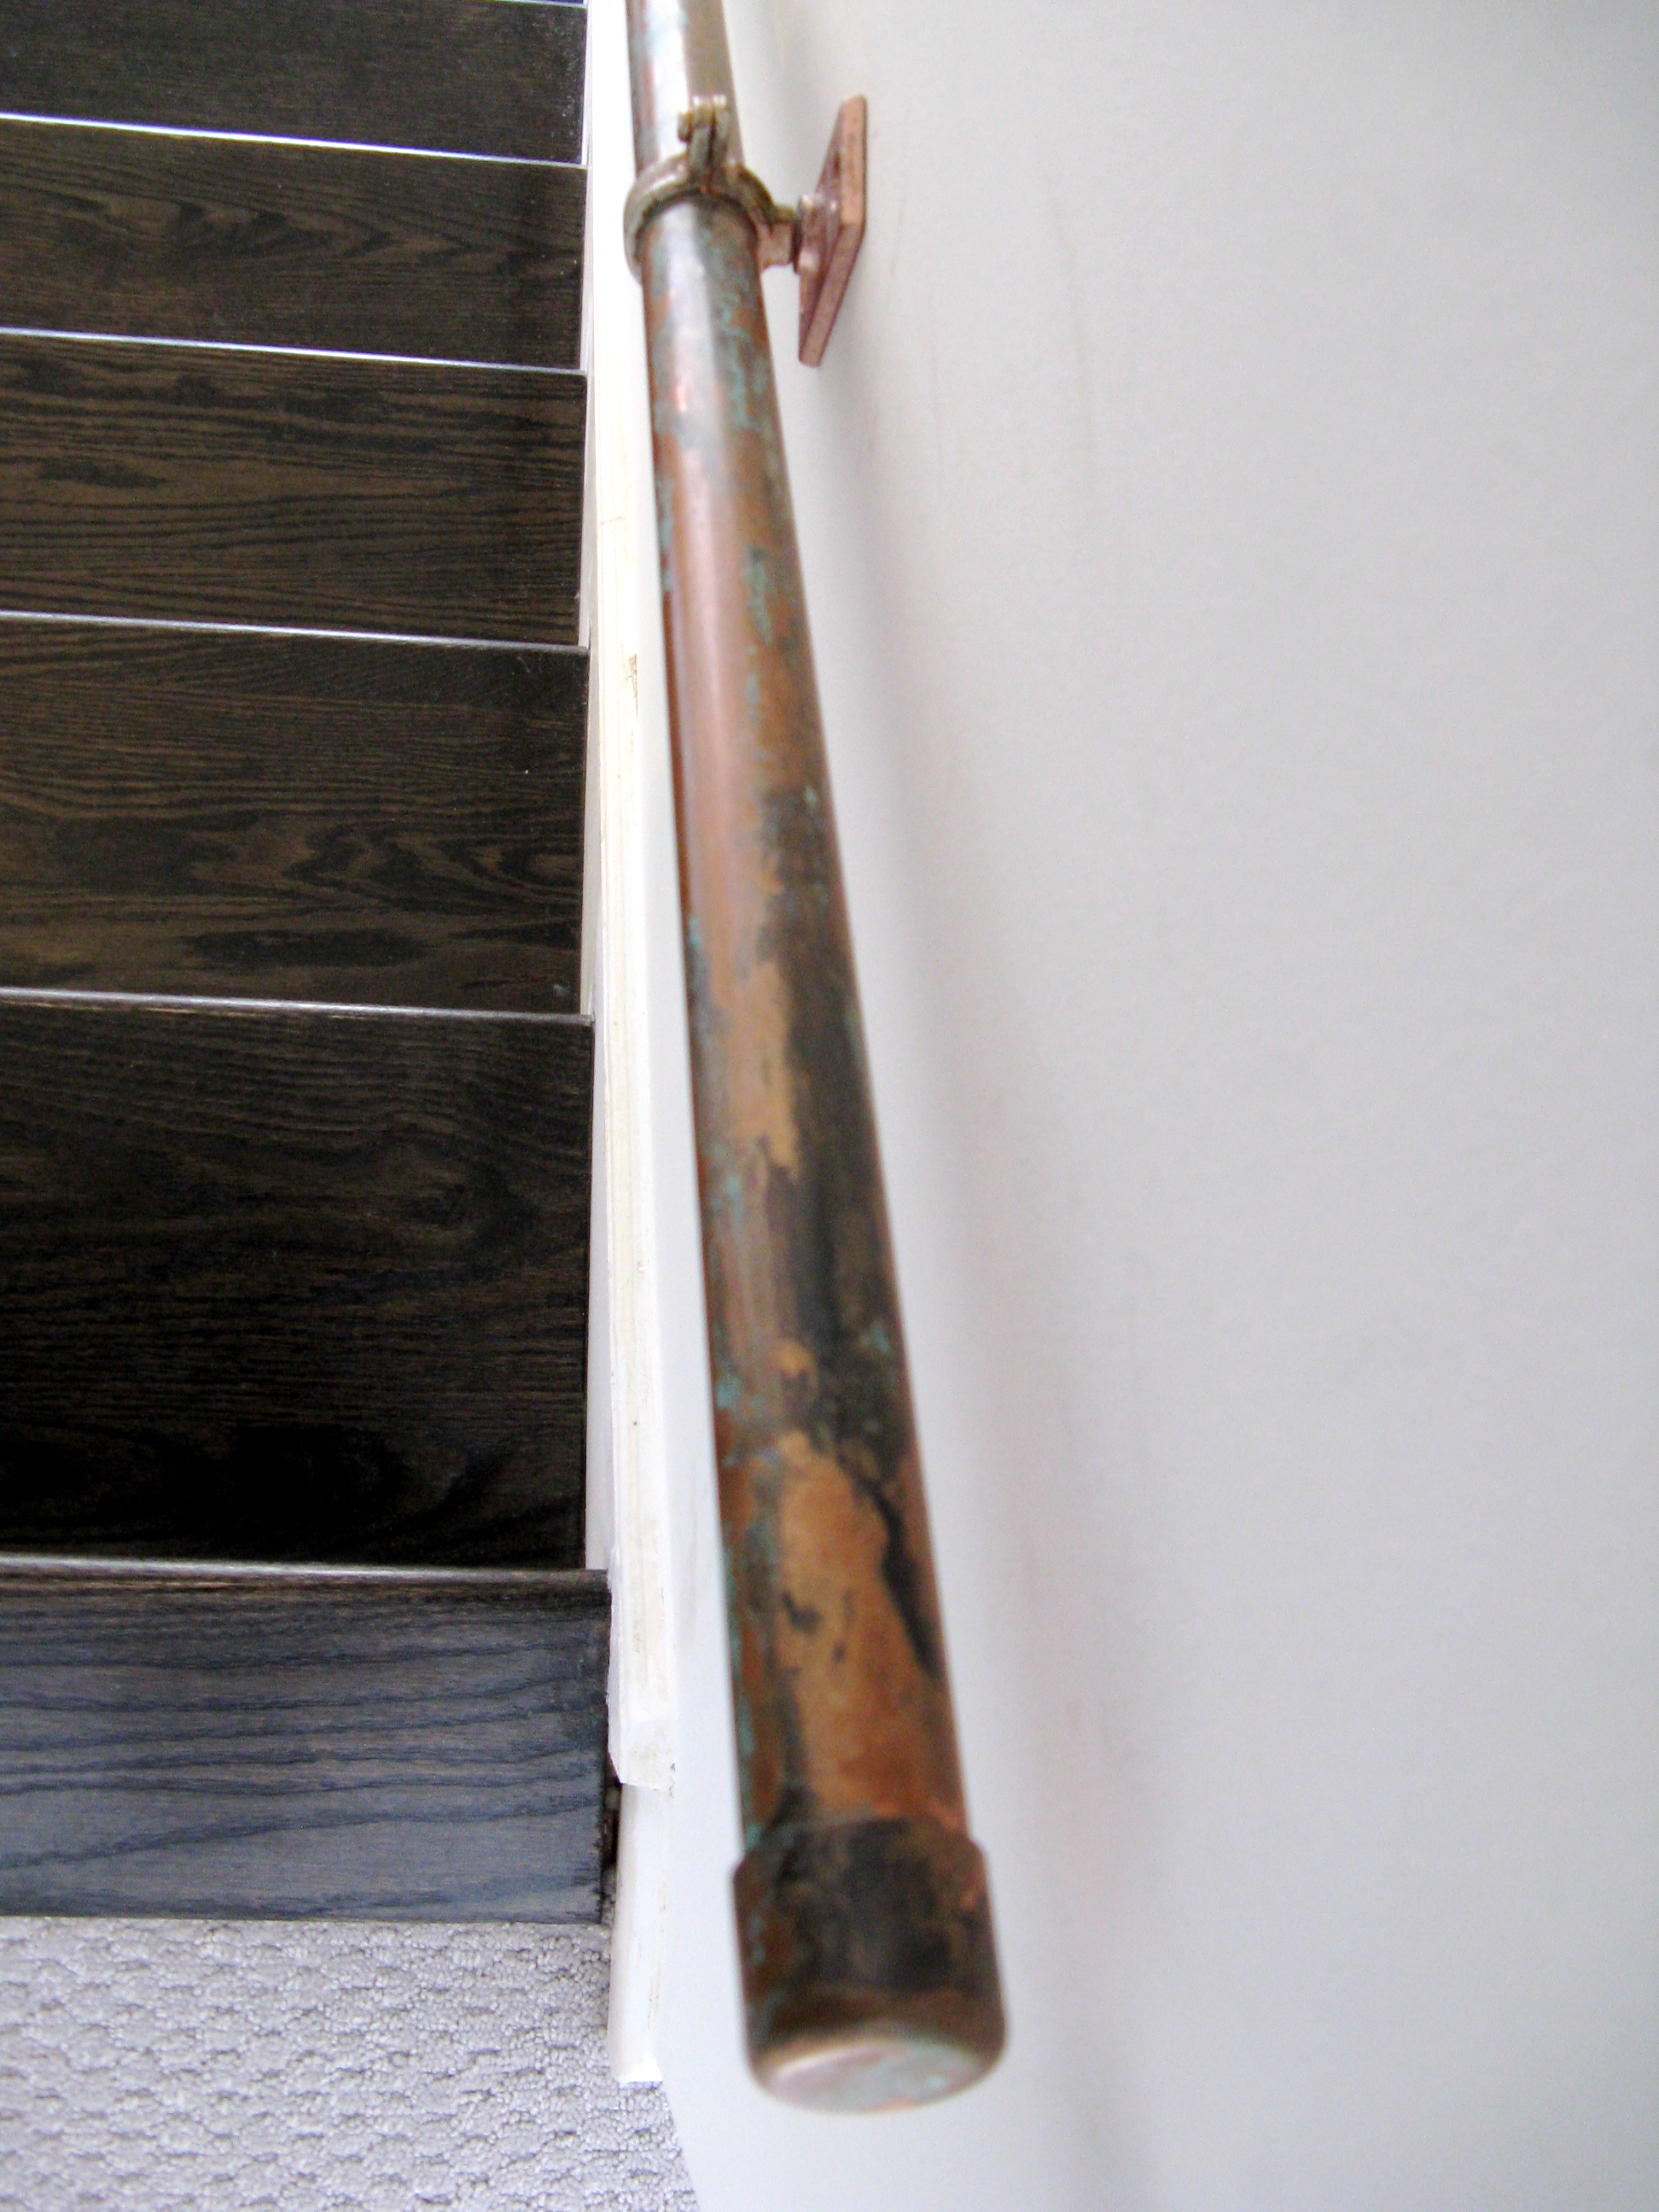
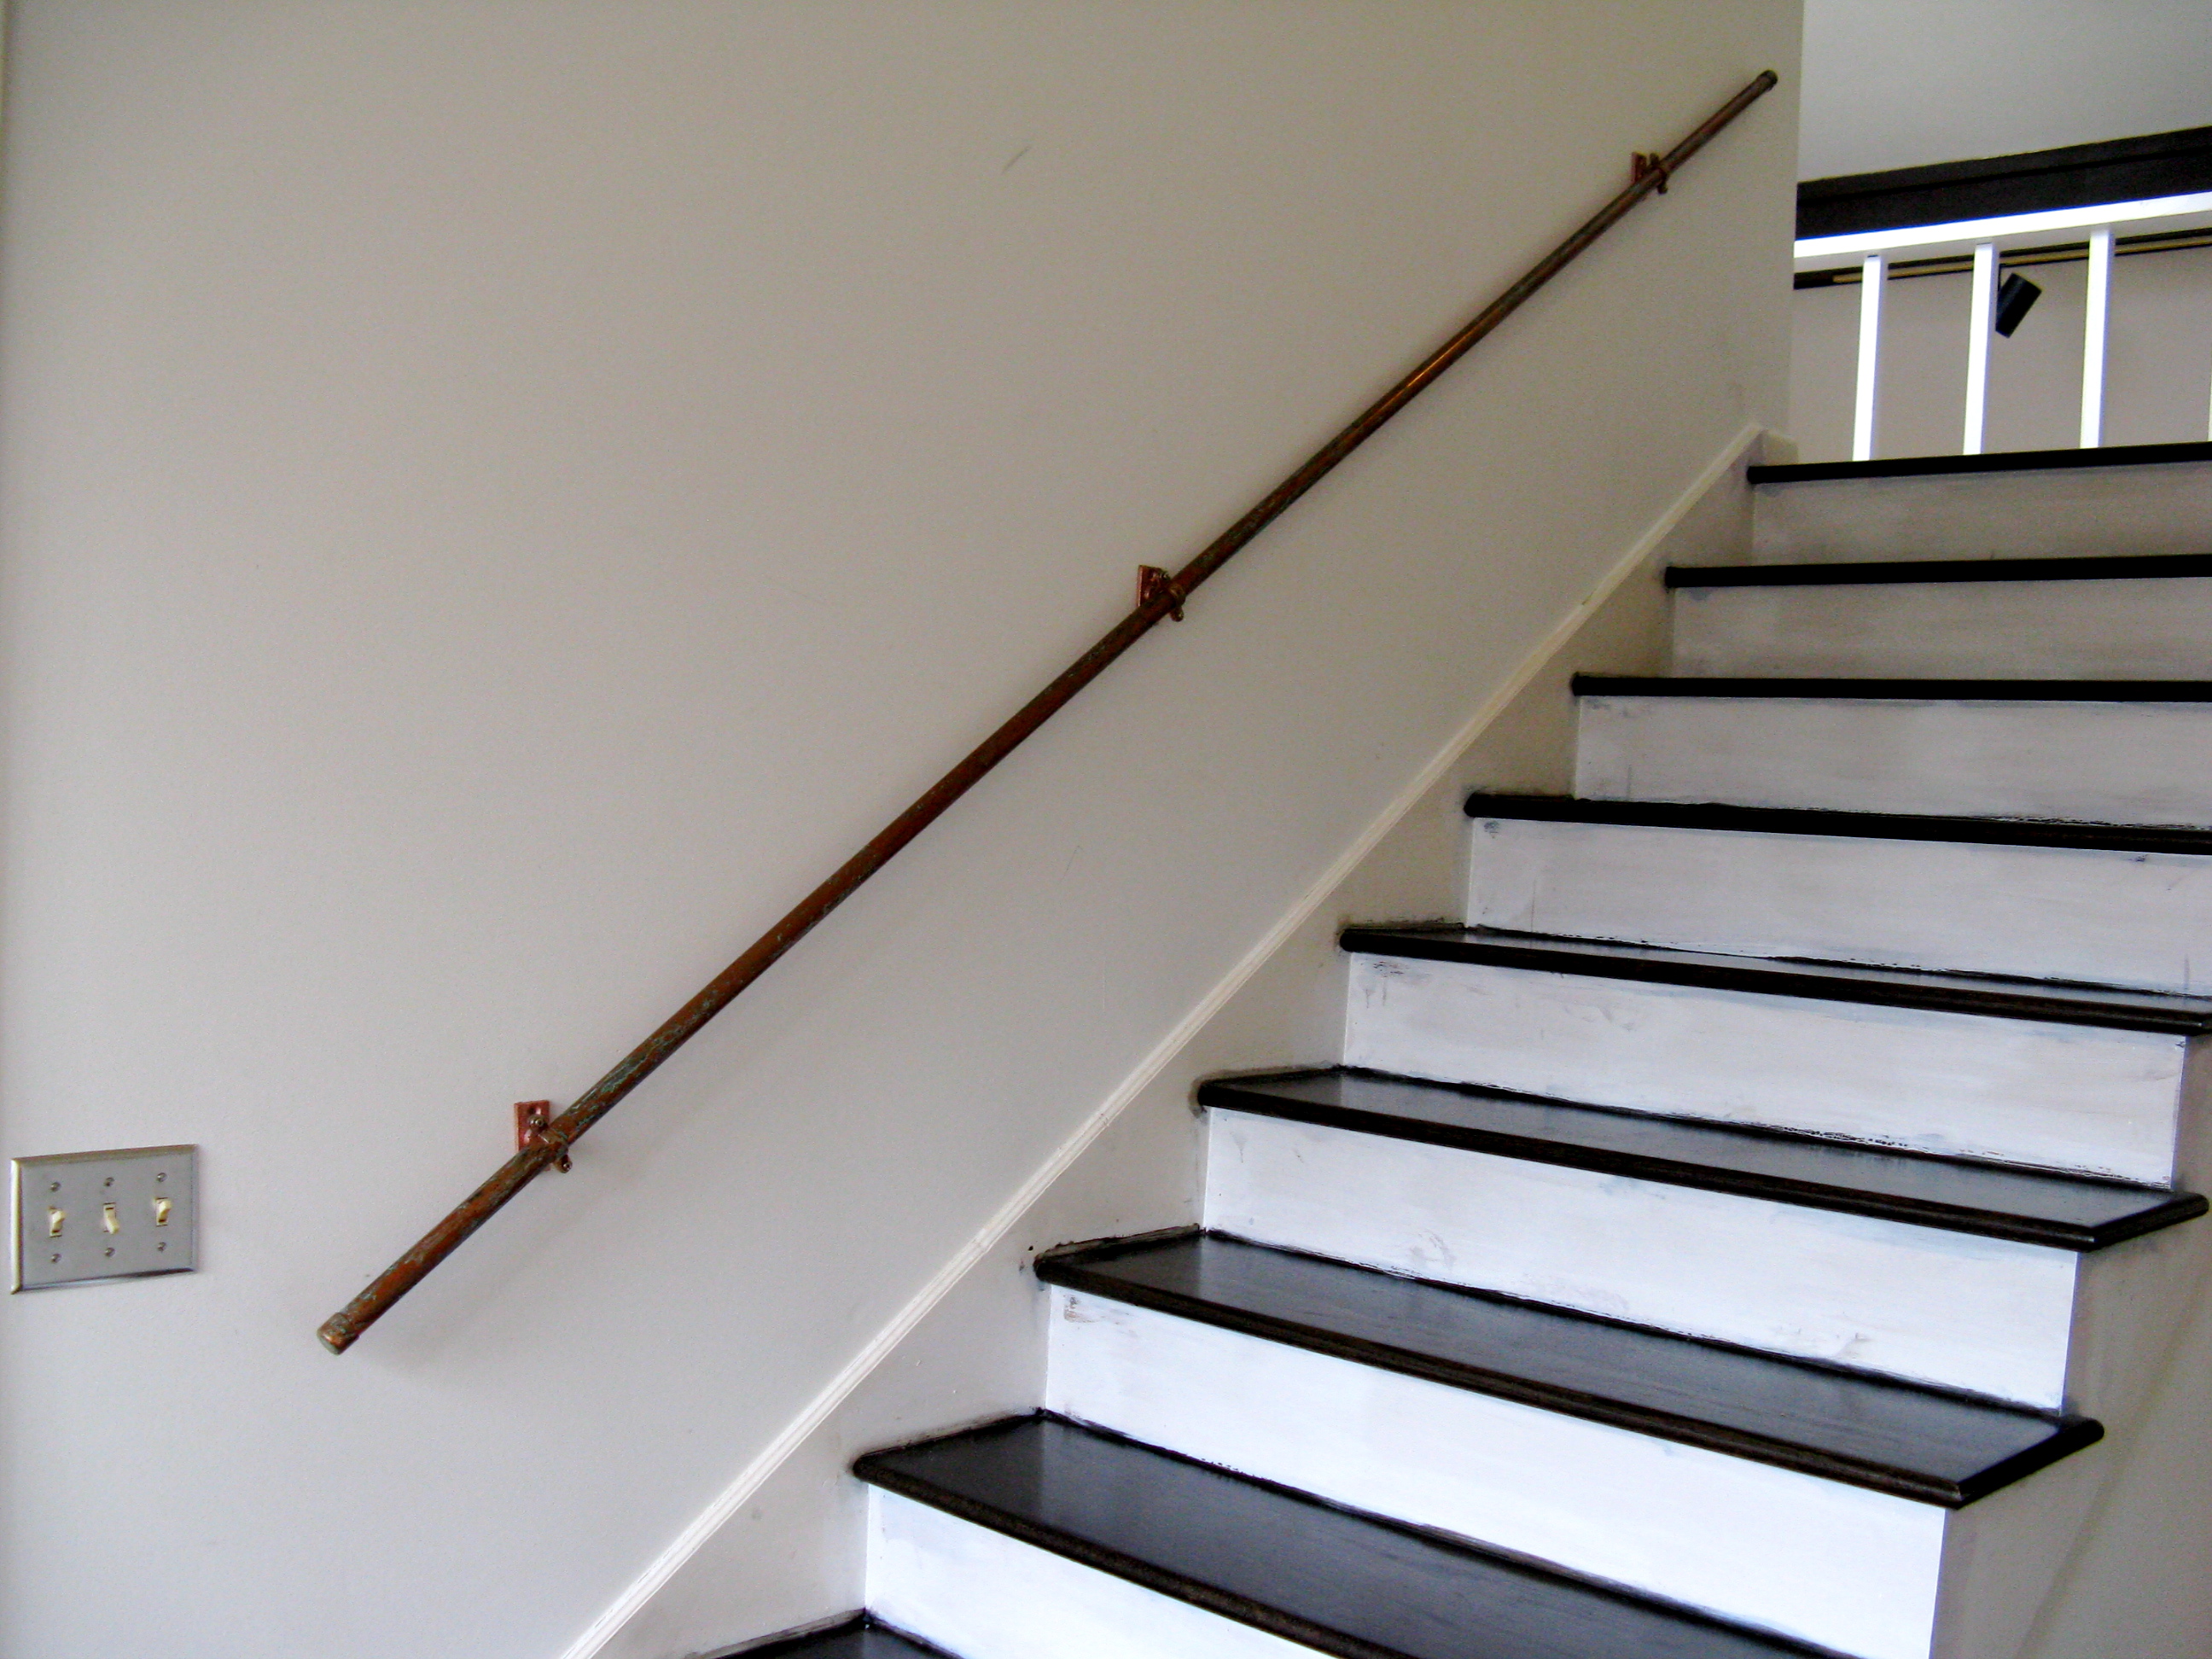
Renovating a stairwell? Looking to replace an old, dated railing, but custom metal fabricating isn’t an option? How about copper plumbing pipe? This whole rail and support materials are found at big box home stores like Lowes or Home Depot. We used 1″ diameter pipe and In these photos, the copper was “aged” with 2 shades of a faux patina found in art stores. Seal with buffed beeswax and then you’re done. Make sure you mount at least 2 of your supports to a stud for stability. All parts cost about $60.
Brackets Secured to StudEndcapFull Rail in Stairwell
I needed an outdoor table that was lightweight and didn’t need repainting every 2 years like all my others. Modern Outdoor, DWR, even West Elm didn’t have quite what I was looking for. I’m in Home Depot and as I turn the corner in the plumbing section, there it is…gleaming galvanized metal.
Home Depot's Water Heater Stand
It’s a stand for a water heater tank, but it was my new outdoor table…for $19.99. I’ve had it 4 years and it looks as good as new – takes the weather like a champ, is easy to move around and has a nice amount of table top space to use as either a coffee table or a side table. Loft livers might like this indoors as well and the smooth table top surface is good for kids arts and crafts too – just hose off the paints! Get a couple more and you can group 3 together as a long coffee table for appetizers on the deck.
NOTE:Â This renovation was done in our last house and completed about 3 months before we found out we were getting transferred and moving. So, unfortunately, I can’t take any more pics!We got such good feedback on it that we decided to include it here anyway. Â Apologies for photo quality.
It was time to redo the bathroom, so of course I start looking for ways to trim the budget so this can actually happen. How much do I love Kohler’s Purist series wall mount faucets, but at $500 each (I needed 2) that was eating a lot into my budget - I had to replace the countertop, sinks, mirrors and floors too! Enter my old friend e-bay. I found really good knock-offs for $99 each (faucets_outlet). So the rest of the renovation now revolved around them.
My better half had been chomping at the bit for a concrete project and here was his chance. He did a bang-up job building the form and pouring the countertop and then we had to wait a month for it to cure. The agony! Details on his process are in the comments below. All told, we pulled off everything you see in the photo of the complete vanity area for about $550. The paldao veneer for the plywood box housing the faucet connections was one of the bigger splurges at $100. The undermount sinks (scottybsports) were also purchased on e-bay for about $50 each.
Here is how my crafty counterpart describes the countertop process:
“Used Quickrete 5000 concrete. Used super plasticizer, latex additive, powder pigment (use max pigment % weight allowed for the weight of concrete, if you want dark/black color). Used 3/8 rebar around edges, tied to sheet of 1/2″ hardware cloth with wire ties. Suspended the rebar/cloth from the top of mold with wire ties until after the thumping to release air bubbles…or it would have sunk to the bottom of the concrete and you want it in the middle.
Got supplies off ebay…from seller ‘concrete-fabricator’. Superplasticizer and latex additive help reduce the amount of water needed to mix the concrete. Less water = good for the concrete mix. Do a slump test – you want to make sure the mix is the right consistency. Mixing concrete with shovel is not fun…rent a mixer.
Used a palm sander with no sandpaper/cling film to release the air bubbles. Thump long time.
When cured and unmolded, filled holes with pigment/cement slurry (same pigment % by weight to cement as main batch). Grind/polished with diamond discs and a wet grinder. Wore a contractor bag with slits cut for arms and head…dirty water gets everywhere when wet grinding.
Sealed with concrete sealer, a few coats. Then beeswaxed to a beautiful hone.â€
"Before" VanityMold/FormForm With ReinforcementsPouring in SlurryPoured in Form - Now We WaitInstalledDoneFinished Product
Not even close. Porcelain. That beautiful rare Congolese wood is now the inspiration for a new range of tile from Porcelanosa in Spain. Now I know what you’re thinking…”Ew, fake wenge – it must look terrible…” I too have a snobby bias against one material masquerading as another, but this seems to be the exception. The tile is called “stick wenge” and has a matte finish. I’ve attached a photo from their website as well as one where it is used as a backsplash in a kitchen. The company also makes a bamboo series which is shown on the contrasting lighter colored wall of the kitchen. Expo design centers sell it, but if you don’t live in a city that has one, the Porcelanosa site can help you find a distributor. How much? $6.50 sf. Yep, that’s right. Bargain. I’ve posted more photos of the kitchen here.