I needed an outdoor table that was lightweight and didn’t need repainting every 2 years like all my others. Modern Outdoor, DWR, even West Elm didn’t have quite what I was looking for. I’m in Home Depot and as I turn the corner in the plumbing section, there it is…gleaming galvanized metal.
Home Depot's Water Heater Stand
It’s a stand for a water heater tank, but it was my new outdoor table…for $19.99. I’ve had it 4 years and it looks as good as new – takes the weather like a champ, is easy to move around and has a nice amount of table top space to use as either a coffee table or a side table. Loft livers might like this indoors as well and the smooth table top surface is good for kids arts and crafts too – just hose off the paints! Get a couple more and you can group 3 together as a long coffee table for appetizers on the deck.
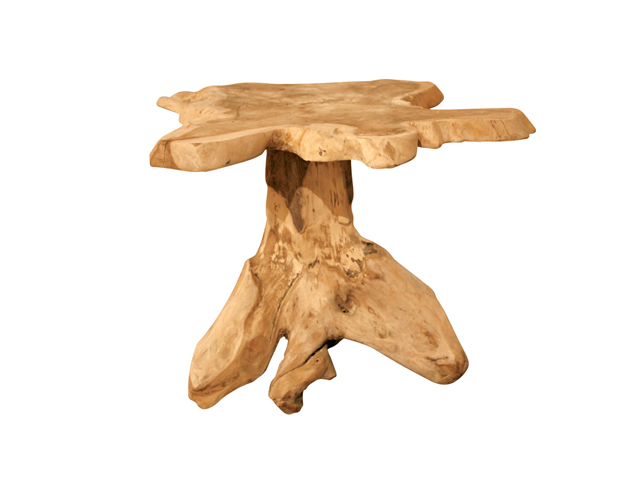
I’ve always dreamed of owning a Nakashima table….maybe when I win the lottery. In the meantime, I’ll settle for a tiny knock-off found at none other than TJ Maxx. One of my better fashion bargain stops is slowly becoming a real contender in home decor. Most urban areas have one and it’s worth sifting through the piles of ugly floral plates to find something like this. It adds the rustic touch to a modern setting without screaming “log cabin”. It doesn’t have the elegantly honed legs that a real one would have, but for $35 vs. $3,500…I can live with that. If $295-$350 sounds like a deal to you, then Pearl River has a nice option.
Another strategy is to buy a slab top from someone like Newton Woods and adding your own legs. For example, the piece below is currently selling for $249 – plus shipping. I have also seen slab tops on e-bay for a wide range of prices – many affordable. Classic mid century turned legs or retro metal hairpin legs would make your table a showstopper.
So I had fun with this over the holidays. If you’re Gen X, you’re probably the last group who can remember the joy of a Polaroid. Now you can download the software developed by Paul Ladroid for free (donations are encouraged but not required) and drag and drop your photos to create Polaroid-like photos. It’s hilarious and it even makes the noise the camera does as it spits your picture out, and then you wait for it to develop on your desktop. Both PC and Mac versions are now available for download.
NOTE:Â This renovation was done in our last house and completed about 3 months before we found out we were getting transferred and moving. So, unfortunately, I can’t take any more pics!We got such good feedback on it that we decided to include it here anyway. Â Apologies for photo quality.
It was time to redo the bathroom, so of course I start looking for ways to trim the budget so this can actually happen. How much do I love Kohler’s Purist series wall mount faucets, but at $500 each (I needed 2) that was eating a lot into my budget - I had to replace the countertop, sinks, mirrors and floors too! Enter my old friend e-bay. I found really good knock-offs for $99 each (faucets_outlet). So the rest of the renovation now revolved around them.
My better half had been chomping at the bit for a concrete project and here was his chance. He did a bang-up job building the form and pouring the countertop and then we had to wait a month for it to cure. The agony! Details on his process are in the comments below. All told, we pulled off everything you see in the photo of the complete vanity area for about $550. The paldao veneer for the plywood box housing the faucet connections was one of the bigger splurges at $100. The undermount sinks (scottybsports) were also purchased on e-bay for about $50 each.
Here is how my crafty counterpart describes the countertop process:
“Used Quickrete 5000 concrete. Used super plasticizer, latex additive, powder pigment (use max pigment % weight allowed for the weight of concrete, if you want dark/black color). Used 3/8 rebar around edges, tied to sheet of 1/2″ hardware cloth with wire ties. Suspended the rebar/cloth from the top of mold with wire ties until after the thumping to release air bubbles…or it would have sunk to the bottom of the concrete and you want it in the middle.
Got supplies off ebay…from seller ‘concrete-fabricator’. Superplasticizer and latex additive help reduce the amount of water needed to mix the concrete. Less water = good for the concrete mix. Do a slump test – you want to make sure the mix is the right consistency. Mixing concrete with shovel is not fun…rent a mixer.
Used a palm sander with no sandpaper/cling film to release the air bubbles. Thump long time.
When cured and unmolded, filled holes with pigment/cement slurry (same pigment % by weight to cement as main batch). Grind/polished with diamond discs and a wet grinder. Wore a contractor bag with slits cut for arms and head…dirty water gets everywhere when wet grinding.
Sealed with concrete sealer, a few coats. Then beeswaxed to a beautiful hone.â€
"Before" VanityMold/FormForm With ReinforcementsPouring in SlurryPoured in Form - Now We WaitInstalledDoneFinished Product
Not even close. Porcelain. That beautiful rare Congolese wood is now the inspiration for a new range of tile from Porcelanosa in Spain. Now I know what you’re thinking…”Ew, fake wenge – it must look terrible…” I too have a snobby bias against one material masquerading as another, but this seems to be the exception. The tile is called “stick wenge” and has a matte finish. I’ve attached a photo from their website as well as one where it is used as a backsplash in a kitchen. The company also makes a bamboo series which is shown on the contrasting lighter colored wall of the kitchen. Expo design centers sell it, but if you don’t live in a city that has one, the Porcelanosa site can help you find a distributor. How much? $6.50 sf. Yep, that’s right. Bargain. I’ve posted more photos of the kitchen here.
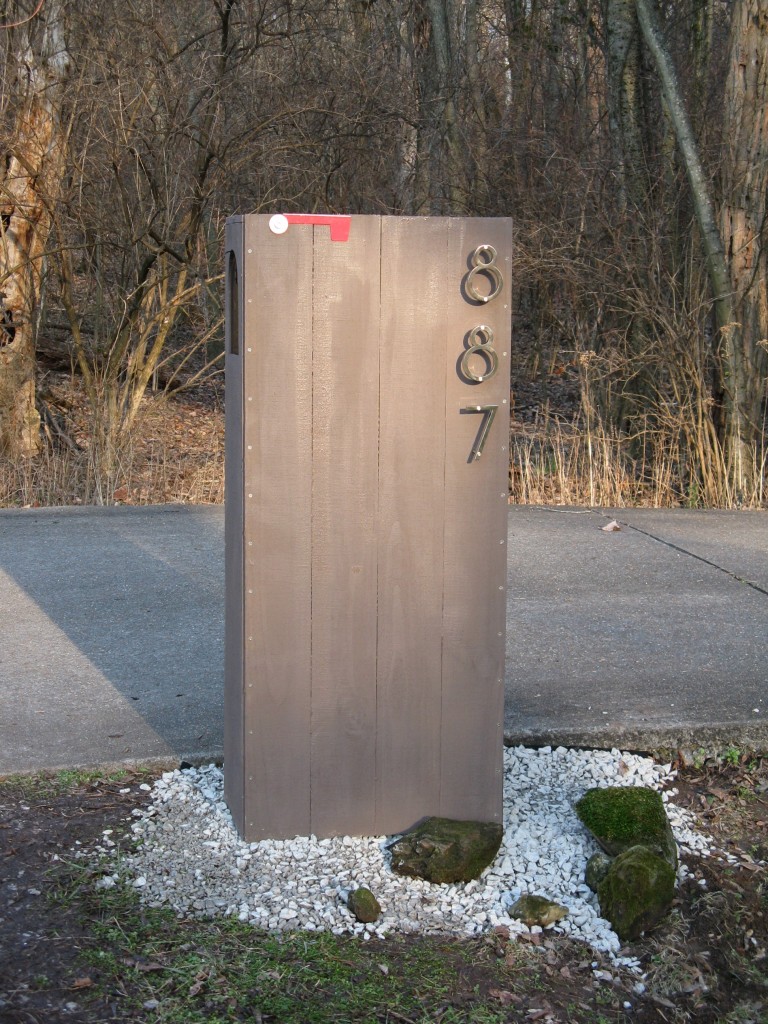
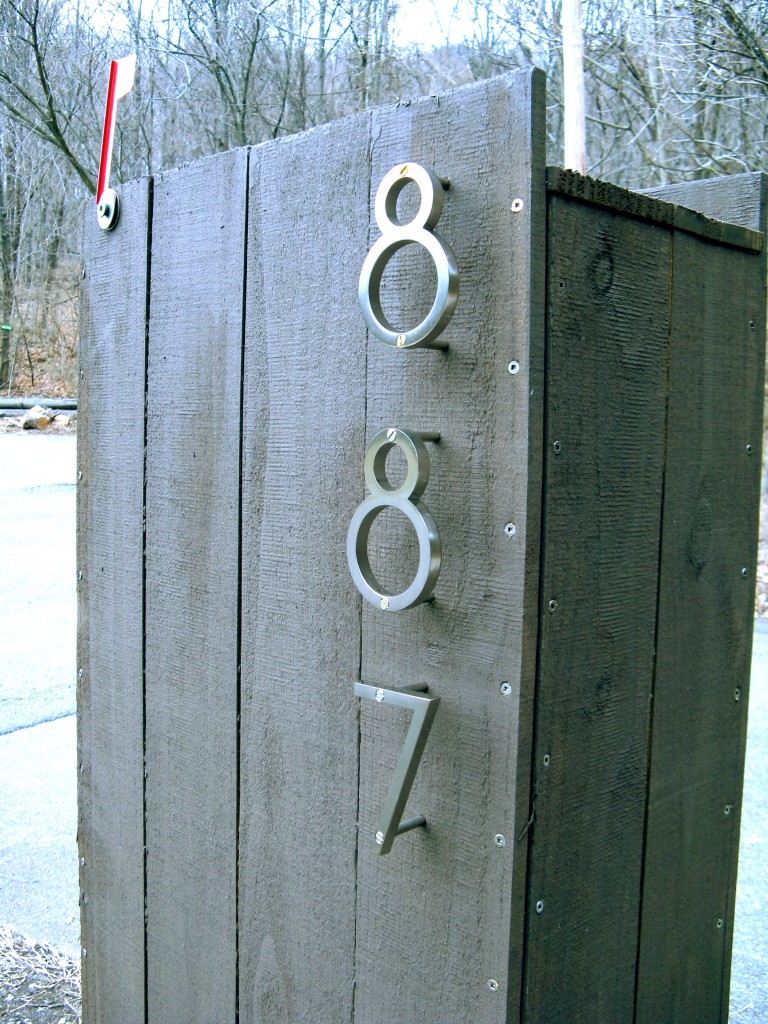
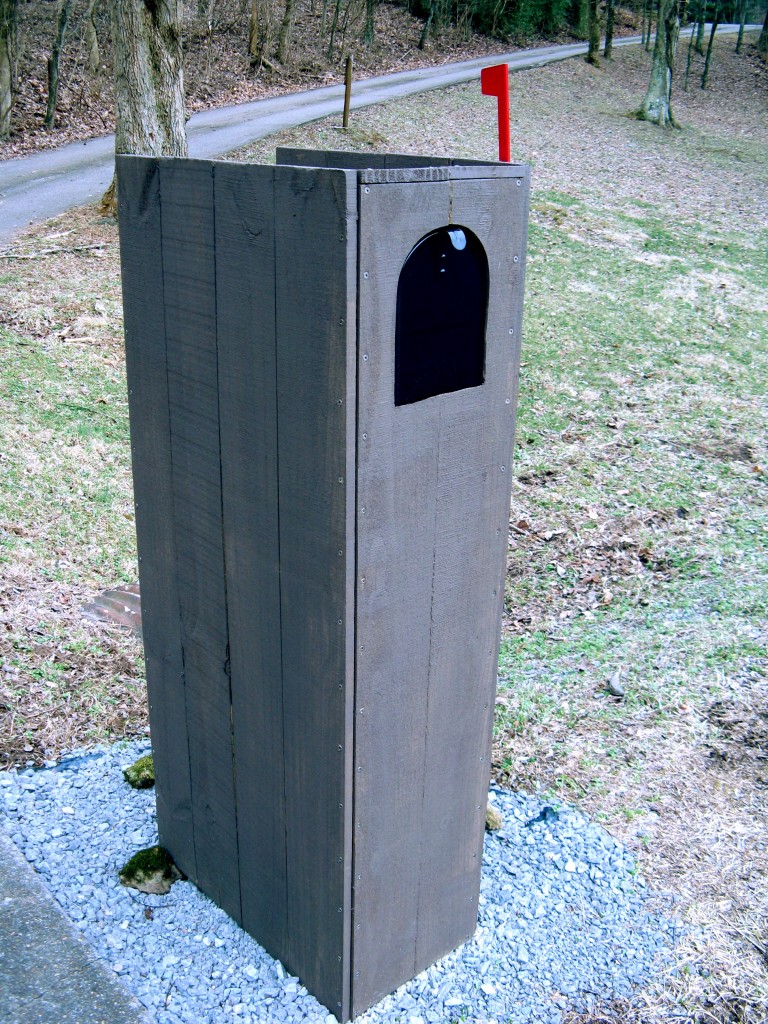
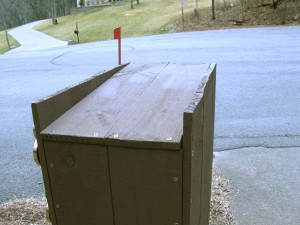
It seems only fitting that my first entry is something completed yesterday, so as the premier feature I offer an alternative to obnoxiously priced modern mailboxes. You must be handy, or, as I am fortunate enough to have, a handy partner who can engineer your vision into reality with a bit of basic carpentry skills. So you’ve googled “modern mailbox†only to find that $400-$4,000 a pop isn’t quite what you can rationalize in your budget. So you start thinking……Can I (or someone dear to me) MAKE something that will suit my taste and not break the bank?
I too have lusted over the Neutra numbers on DWR, but again, $75 each….enter research mode.
WestOn Letters’ (link below) website provides my numbers at a budget price -I choose “deep ribbon†with spacers. Cost about $85 for all 3. I sketch out my vision of simplicity to be translated by my crafty counterpart into real measurements. Wood, deck stain, gravel brought the grand total up to about $125.
Â
Pressure treated dog eared fence pickets screwed together on a frame with stainless steel screws. He cut the curve for the mailbox with a reciprocating saw and built a platform within the column for the mailbox to sit. We used our old mailbox so that cost is not included in our budget. Gravel at the base serves 2 purposes – keeps the look minimalist, but also keeps the wood off the dirt so it won’t rot, despite being pressure treated. We put a sheet of plastic under the gravel as well as an additional moisture barrier. The roof between the side walls is pitched at a slant (shed roof) for water runoff.
Found the mossy stones in my yard to finish the look and voila!
UPDATE: I’ve added this to the FAQ since I get it a lot!
Q: How is the mailbox attached to the ground?
A: It’s not! The box we built for the mailbox housing is a sleeve with a crossbar that the metal mailbox is mounted upon. The original post in the concrete is still under there to keep it from falling over or getting knocked over.